Shortcuts Tips: Search for Stock Photo

If you’re a long-time reader, you’ll know that HeyDingus doesn’t have a lot of photography. Screenshots? Sure. But featured photos? Not really. Despite having created a complicated shortcut for uploading pictures to a CDN, and cobbled together a workflow to make those Markdown-based images work with Squarespace, it’s rare that I include images in my posts.
Part of that is because I’m an inexperienced photographer without a lot of confidence. And it’s partly due to my influences — I tend to gravitate toward word-focused blogs like Daring Fireball. However, there’s no denying that the occasional featured image can enhance a post and key the reader into the subject. But with my Shortcuts-centric, iPhone and iPad-heavy workflow, what’s the best (read: easiest, because any friction will reduce my interest in using them) way to get quality photos ready to insert with Markdown?
With Shortcuts itself, of course!
I’ll cut to the chase. This shortcut searches a stock photo library, presents options, previews your selection, and then gives you options on what to do with it using the Share Sheet, and copies the photo’s credit to the clipboard. It’s pretty neat.
Get the ‘Search for Stock Photo’ shortcut → Original Version | Latest Version
A Little Background
Months ago, I noticed a Shortcuts action provided by Toolbox Pro that mentioned Pexels photos. I knew I had seen that word, “Pexels”, before. A quick search showed me that it’s a stock photo library. It is similar to Unsplash (which seems to integrate with every service and their brother, including Squarespace) in that it offers free stock photos and videos but is different in that it isn’t owned by a large corporation.
When I saw that action, I knew I could build what I wanted: a shortcut that would let me choose a photo and then pass it and its metadata through to my existing workflows. But the key to its effectiveness was leveraging the excellent parameters that developer Alex Hay built into the Toolbox Pro action.

Now would be a good time to mention that while Toolbox Pro is a free application with tons of outstanding actions at no cost, this particular ‘Find Pexels Photos’ action is part of its premium in-app purchase. That said, a mere $6 one-time payment unlocks all of the premium actions. I’ve barely scratched the surface of Toolbox Pro’s power, and there will be so much more to explore once Alex introduces macOS support down the road. Yes, that also means that this shortcut doesn’t yet work on the Mac. It’s a bummer for me, too.
Let’s get into how the shortcut is put together.
Putting Together the Pieces
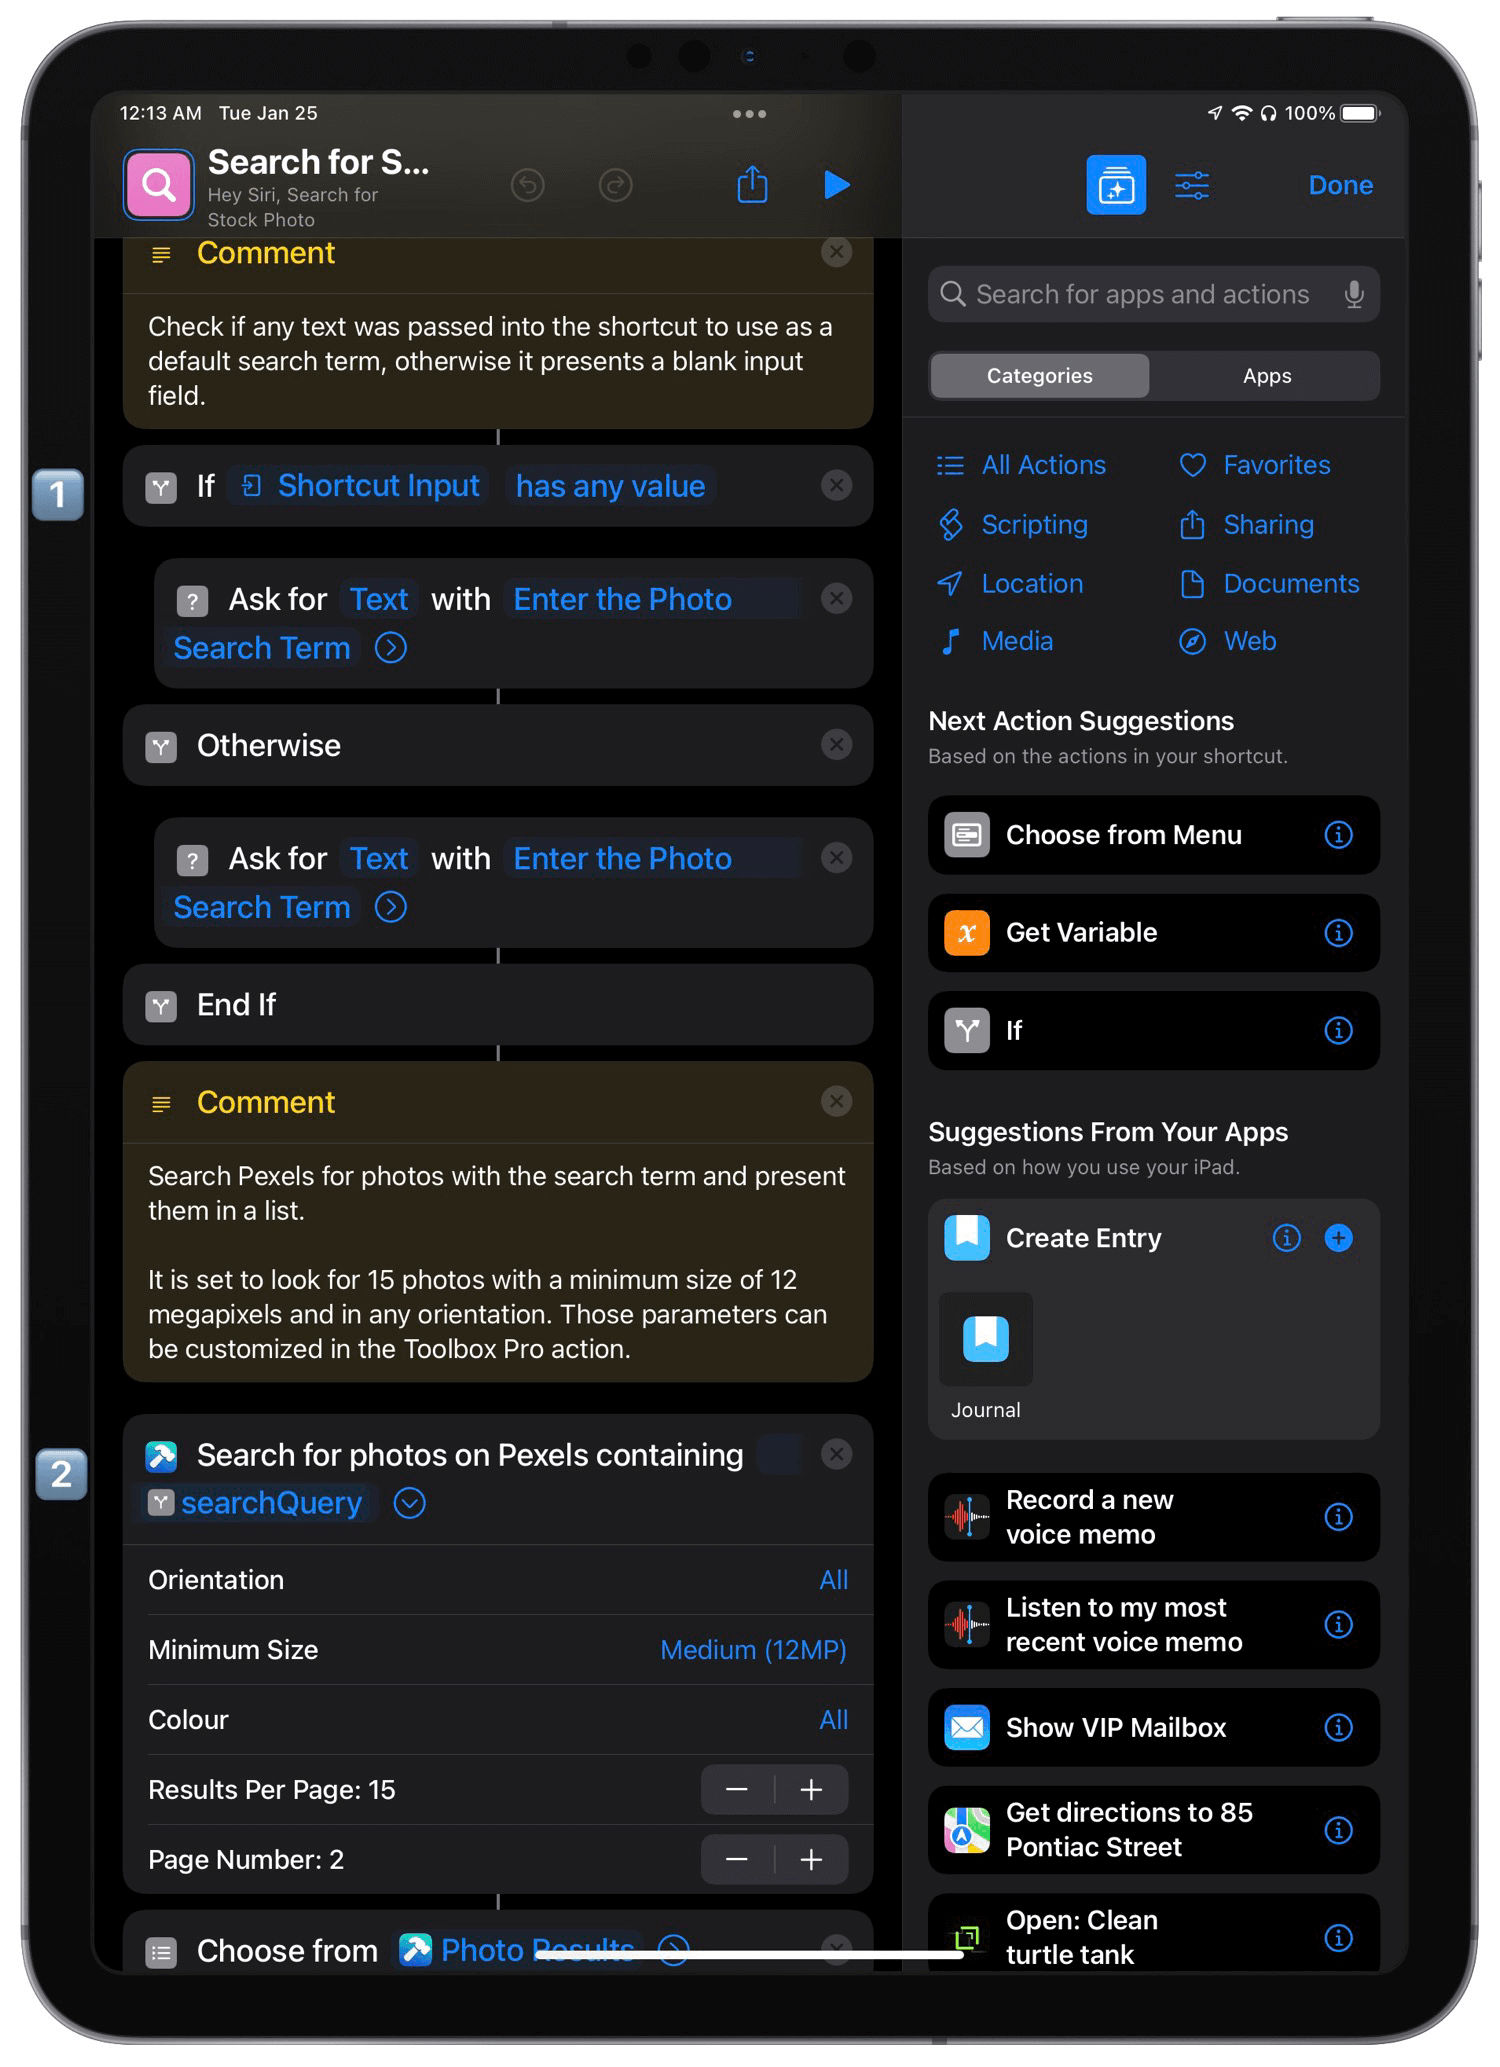
1️⃣ I got clever in how this shortcut handles input. I wanted it to accept text input so that I could highlight a word in an article and then share it to the shortcut as the search term. I could have used iOS 15’s new Shortcut Input parameters to have it ask for text if nothing was passed in, but I wanted to reuse the actions if I needed to restart a search using the same search term — more on that later. So, in this case, I have the shortcut continue onto an ‘If’ action when no input is passed.
The ‘If’ action checks to see if the input has any value and then presents an ‘Ask for Input’ action. When there is input detected, it’s filled by default. If not, the ‘Ask for Input’ is blank.
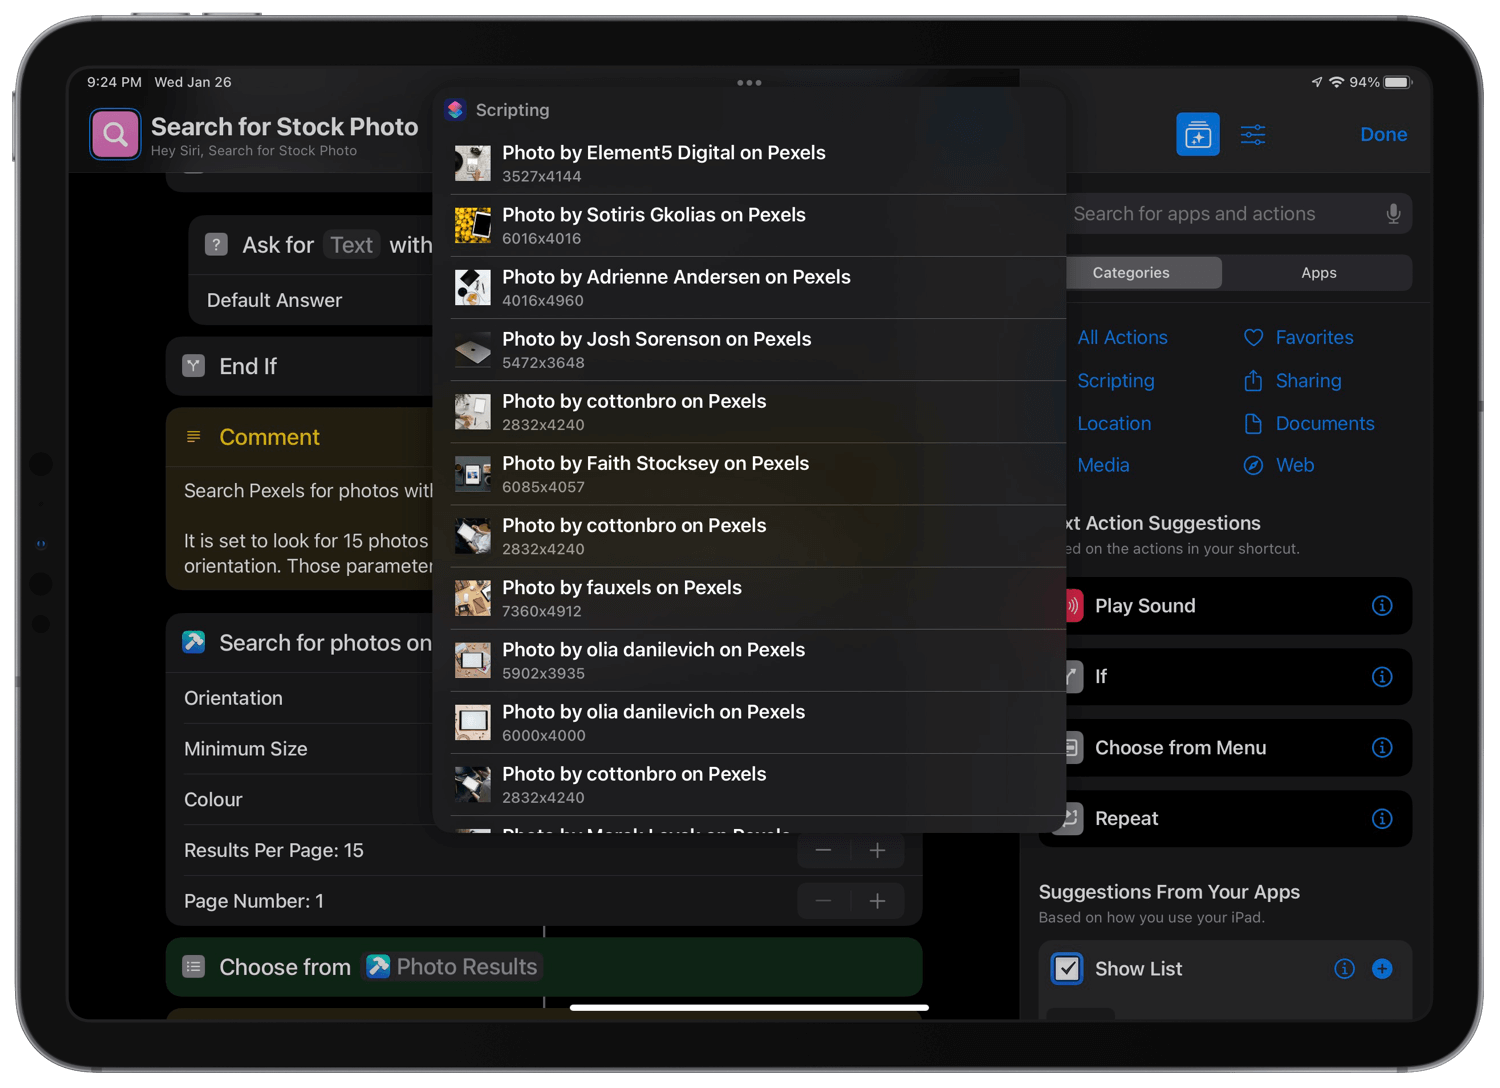
2️⃣ Here’s the meat of the shortcut; the ‘Find Pexels Photos’ action. You can see here that I’m using the ‘If’ result as a Magic variable, labeled as ‘searchQuery’. I’ve set the search parameters to be any orientation, a minimum of 12 megapixels, and providing 15 results. Those results are passed as a variable to a ‘Choose from List’ action, using the ‘Pexels Photos’ type.
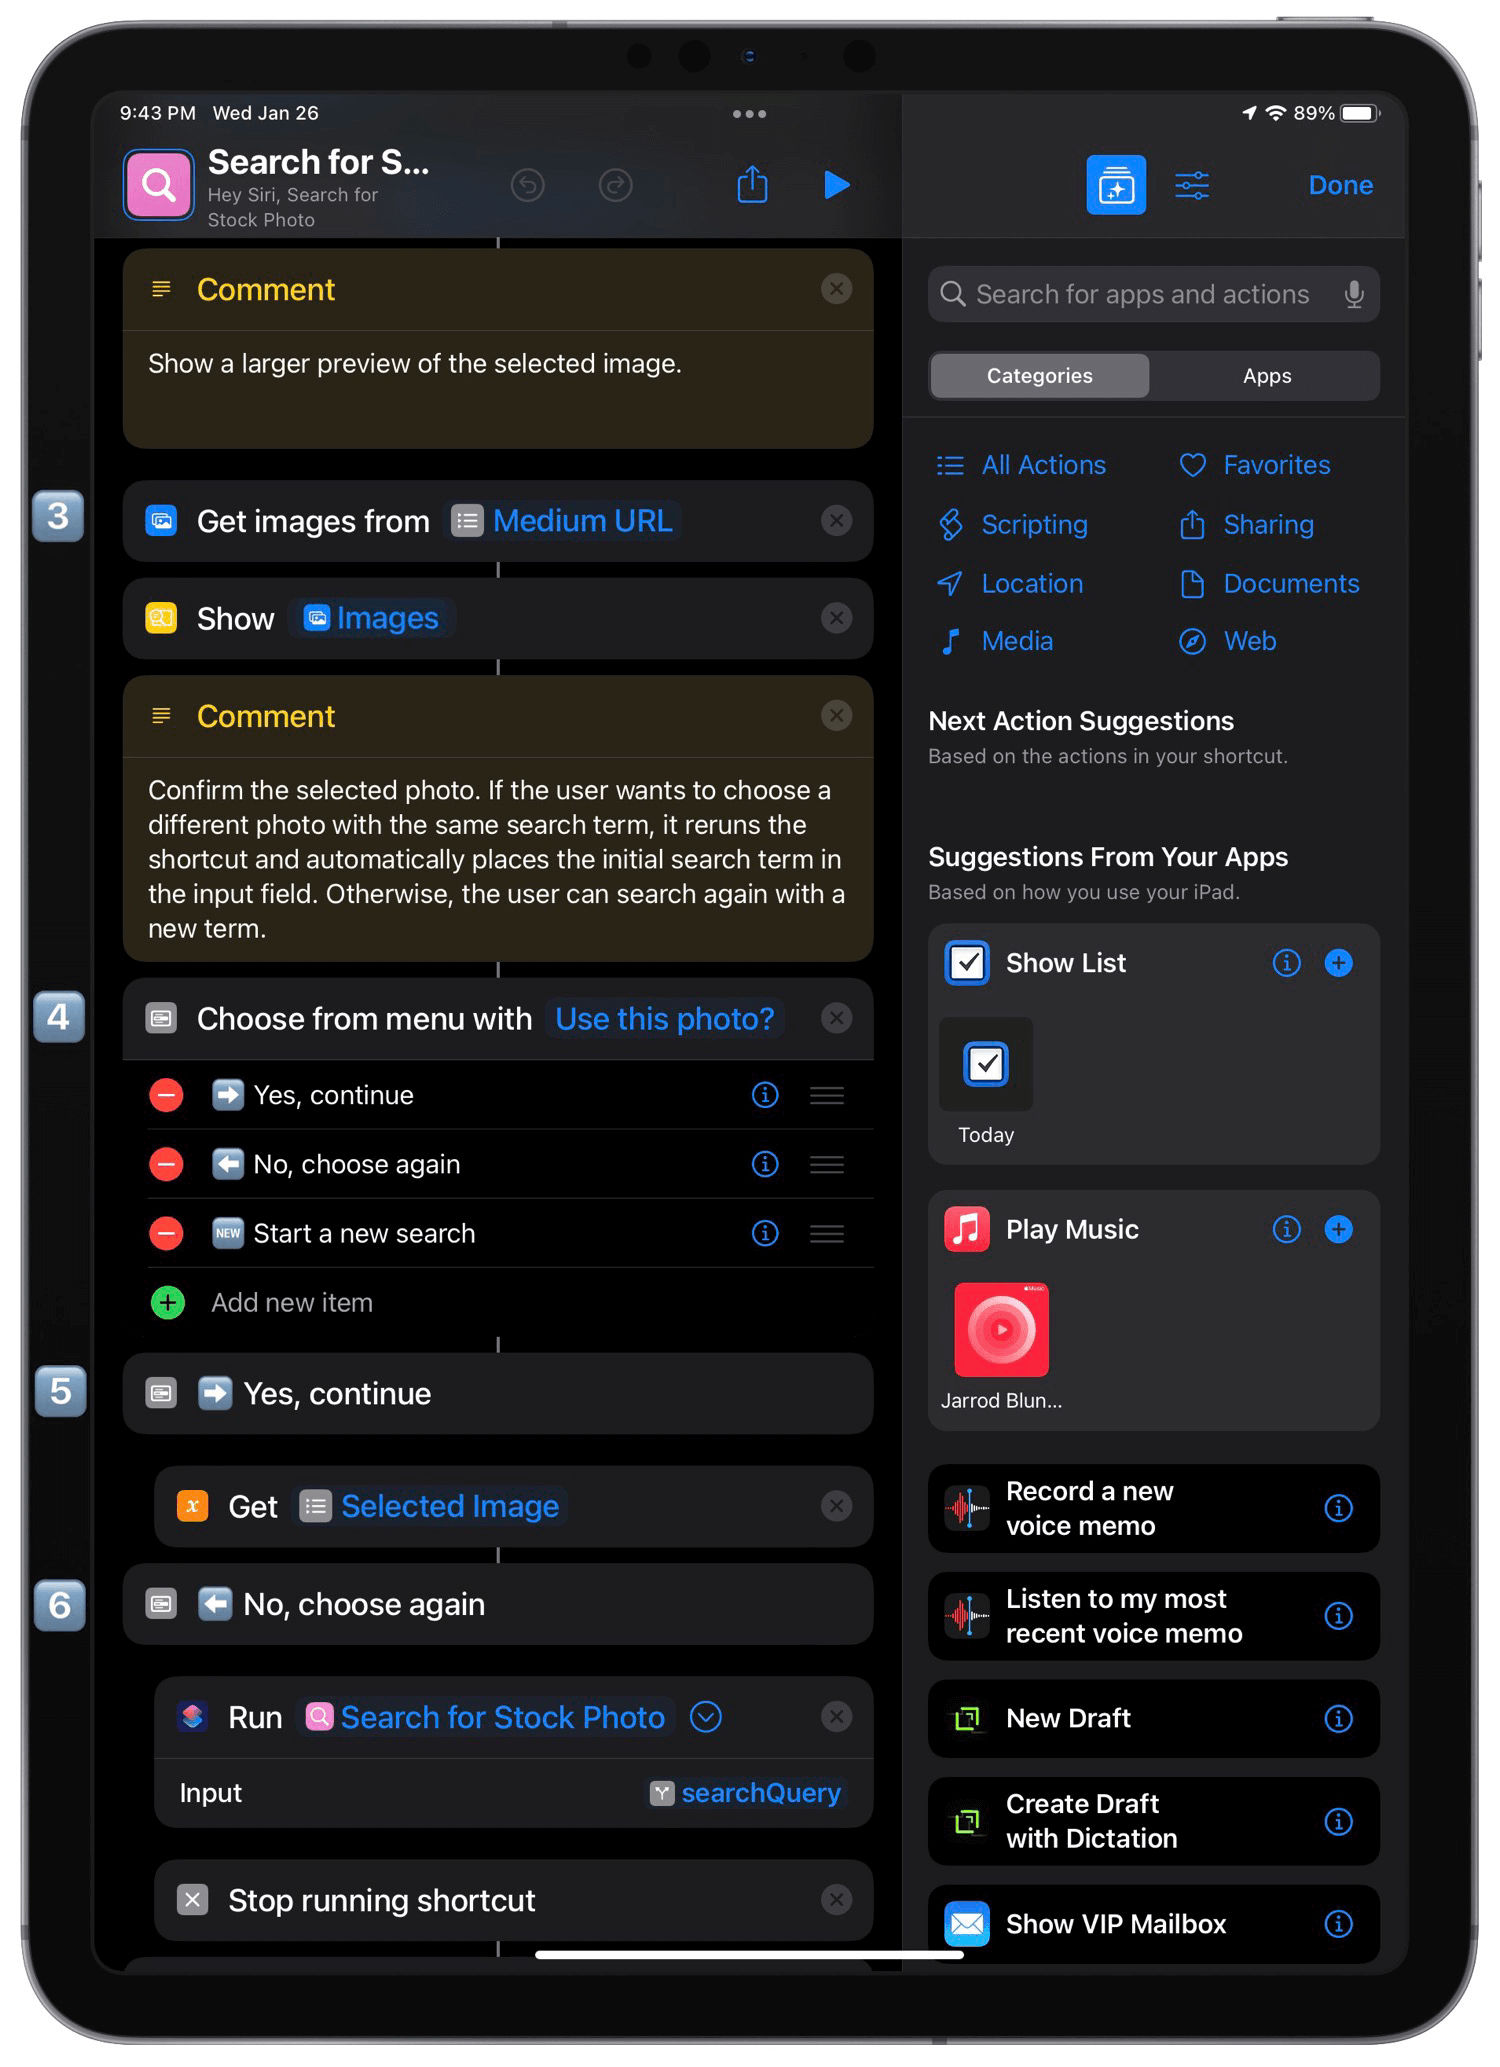
3️⃣ Here’s where we start making use of the output parameters. This ‘Get Images from Input’ action retrieves the image from the URL of the medium-sized image URL that Pexels provides. It’s big enough to preview using the ‘Show Result’ action, but not full-quality. This method speeds things up and reduces the amount of data you’re downloading throughout the shortcut.
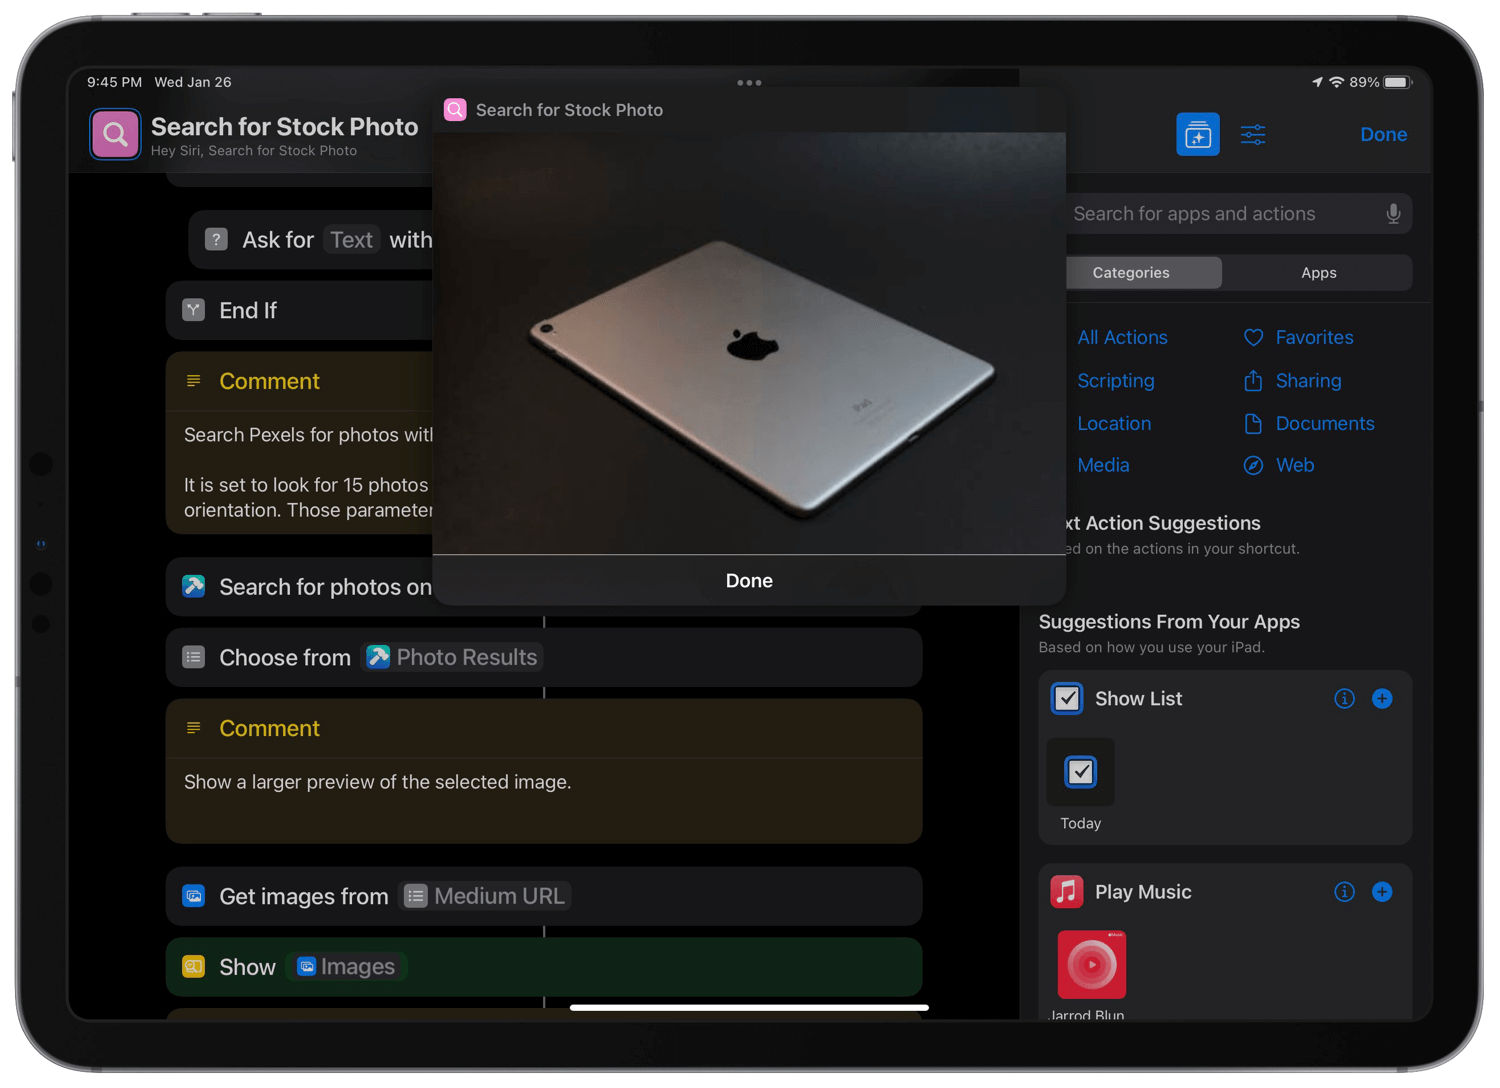
4️⃣ Since the ‘Choose from List’ thumbnails are pretty small, I wanted the option to choose again in case the selected image wasn’t quite right upon further inspection with ‘Show Result’.
5️⃣ The first option is simply to continue, and it gets the variable for the selected image so it can be passed as the result of the ‘Choose from Menu’ action.
6️⃣ The second option is where things get interesting. I told you we’d come back to rerunning this shortcut as a function. Since there’s no easy way to return to an arbitrary point in the shortcut once it’s running, the best way to return to the result list is just to run it again. So that’s what happens if you select “No, choose again”. It reruns itself, passes the original search term as input, and stops the first run-through. It’s important to stop the initial shortcut here because otherwise, you get into a nasty loop.
Remember how the initial ‘If’ action presents an ‘Ask for Input’ based on the Shortcut Input. The shortcut will default to the inputted search term when running it as a function. All you need to do is hit “Done”, but you could edit the query on the second round, too.
Running shortcuts as functions, especially running itself, is an advanced technique that I’m still somewhat wrapping my head around.
7️⃣ If you’d prefer to start fresh rather than rerun the exact search, this option runs the shortcut as a function, but no input text is passed along. Again, we stop running the original flow with a ‘Stop Shortcut’ action.
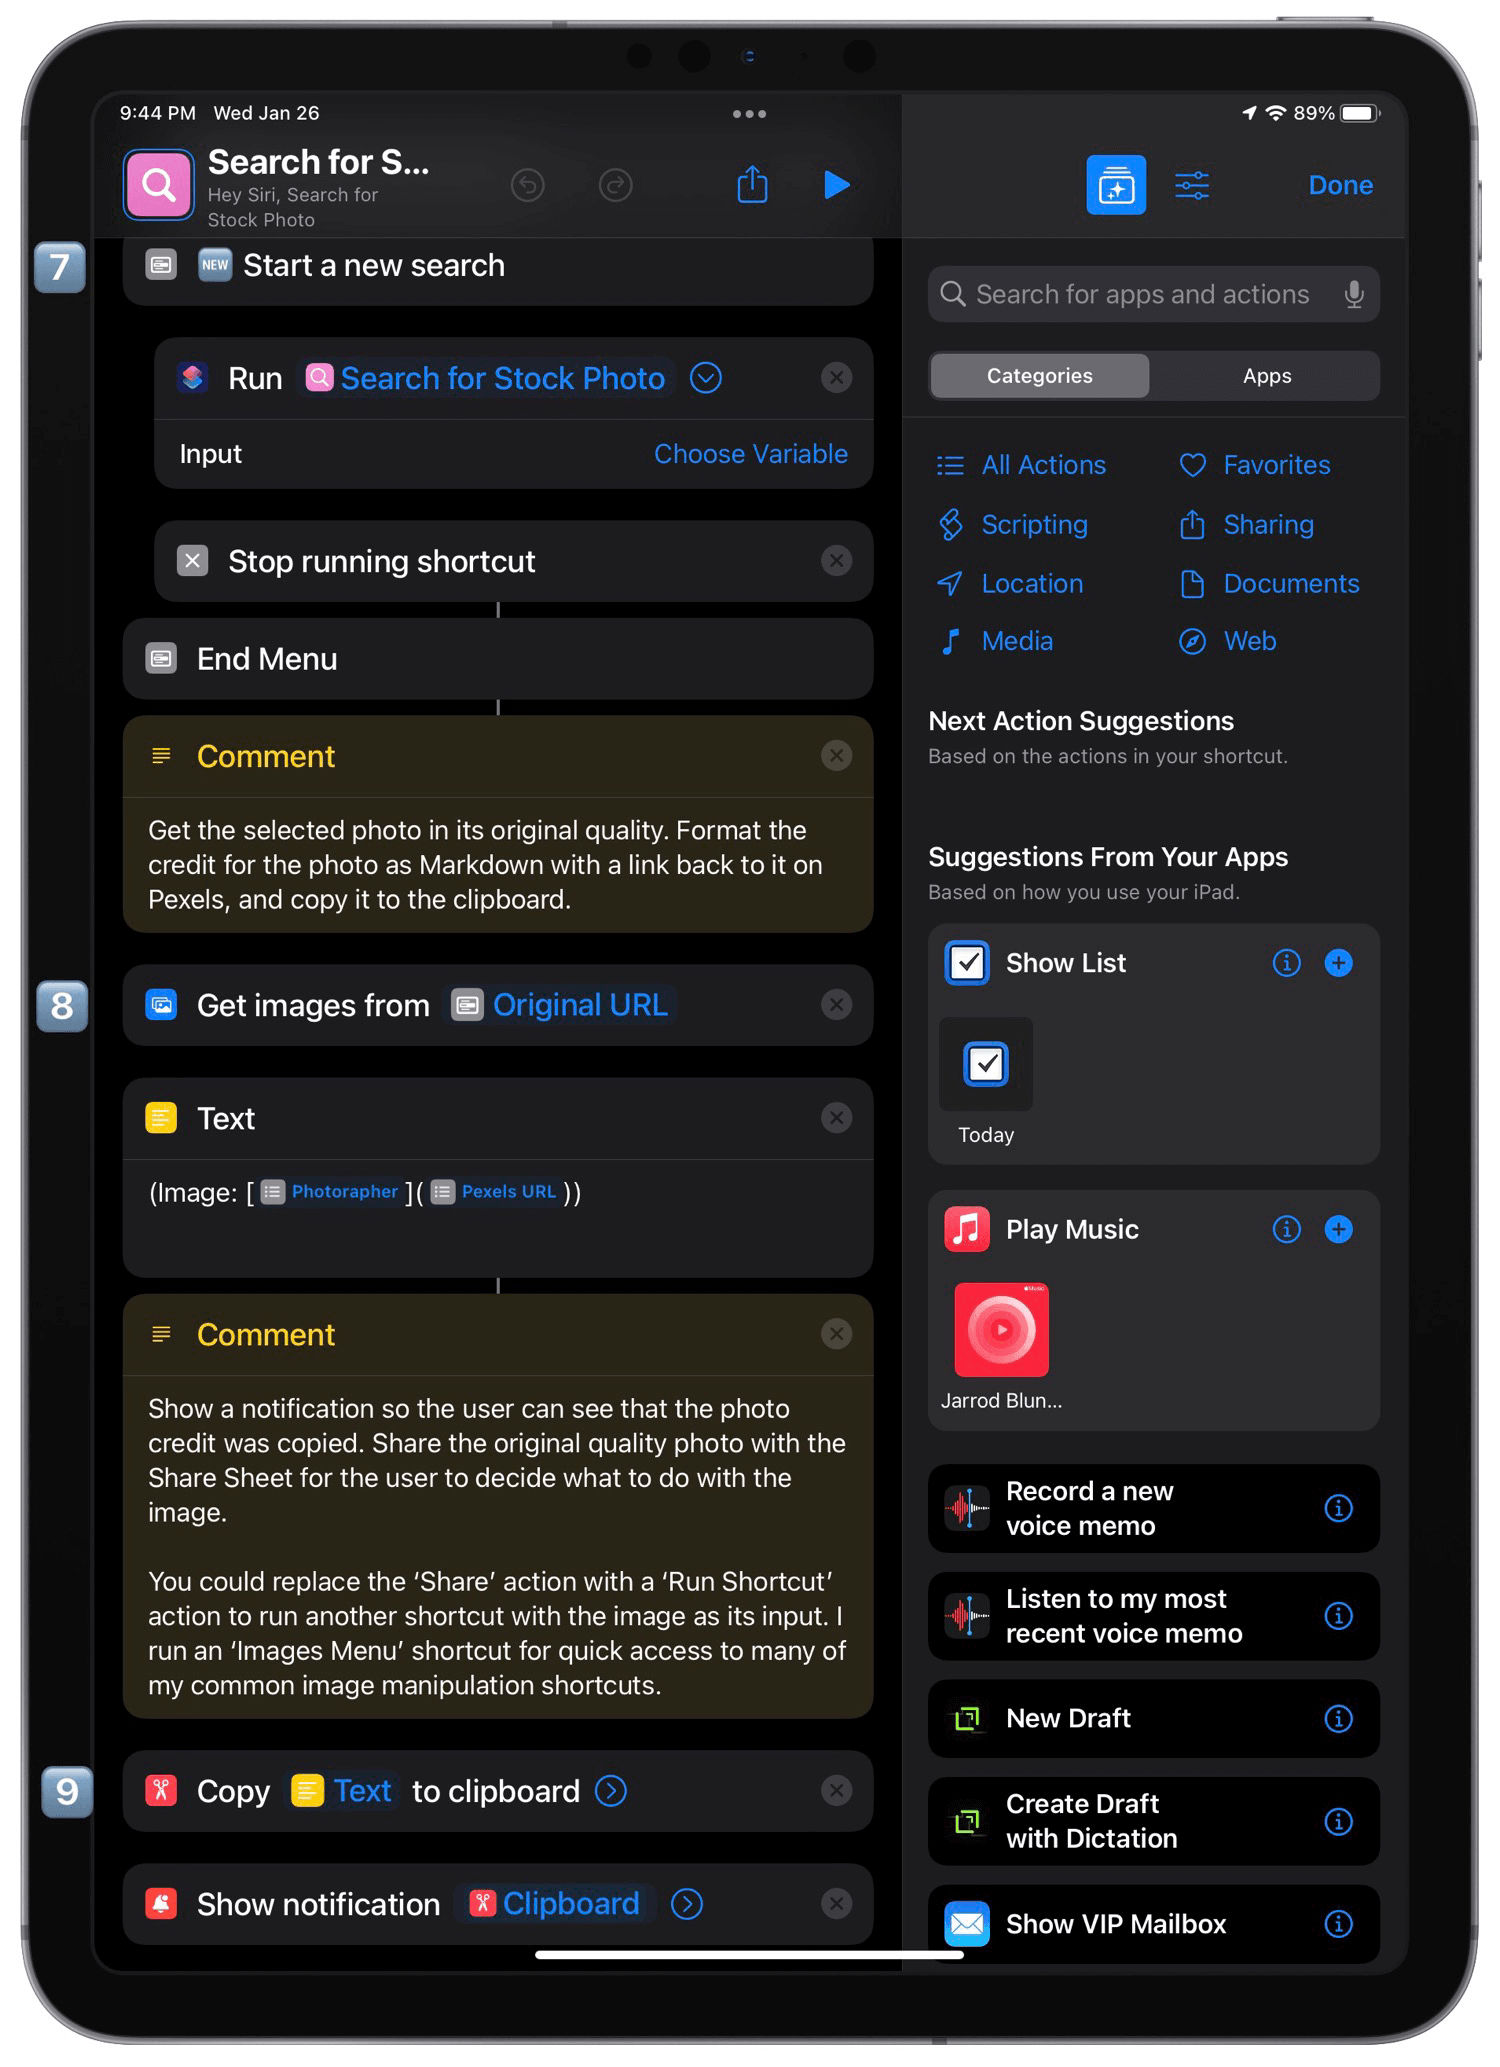
8️⃣ In the end, we want the actual full-quality photo, right? By using another ‘Get Images from Input’ action, but acting on the Original URL output parameter this time, we download the selected photo for later use.
For a little while, I got tripped up by the ‘Pexels Photo’ output parameter when I tried to use that as the final photo. It doesn’t work as well as getting the original image from its URL.
9️⃣ People like to be recognized for their work, so I do my best to credit anyone on HeyDingus for linked and quoted articles and any images that I use and didn’t create. Pexels doesn’t require it as part of their Terms of Service, but I still think it’s important.
This ‘Text’ action formats the image credit the way I like them for HeyDingus. My personal preference is to credit the artist rather than the platform, so I link the photographer’s name back to the photo’s page on Pexels’ website. That page also links to the photographer’s profile and the rest of their work.
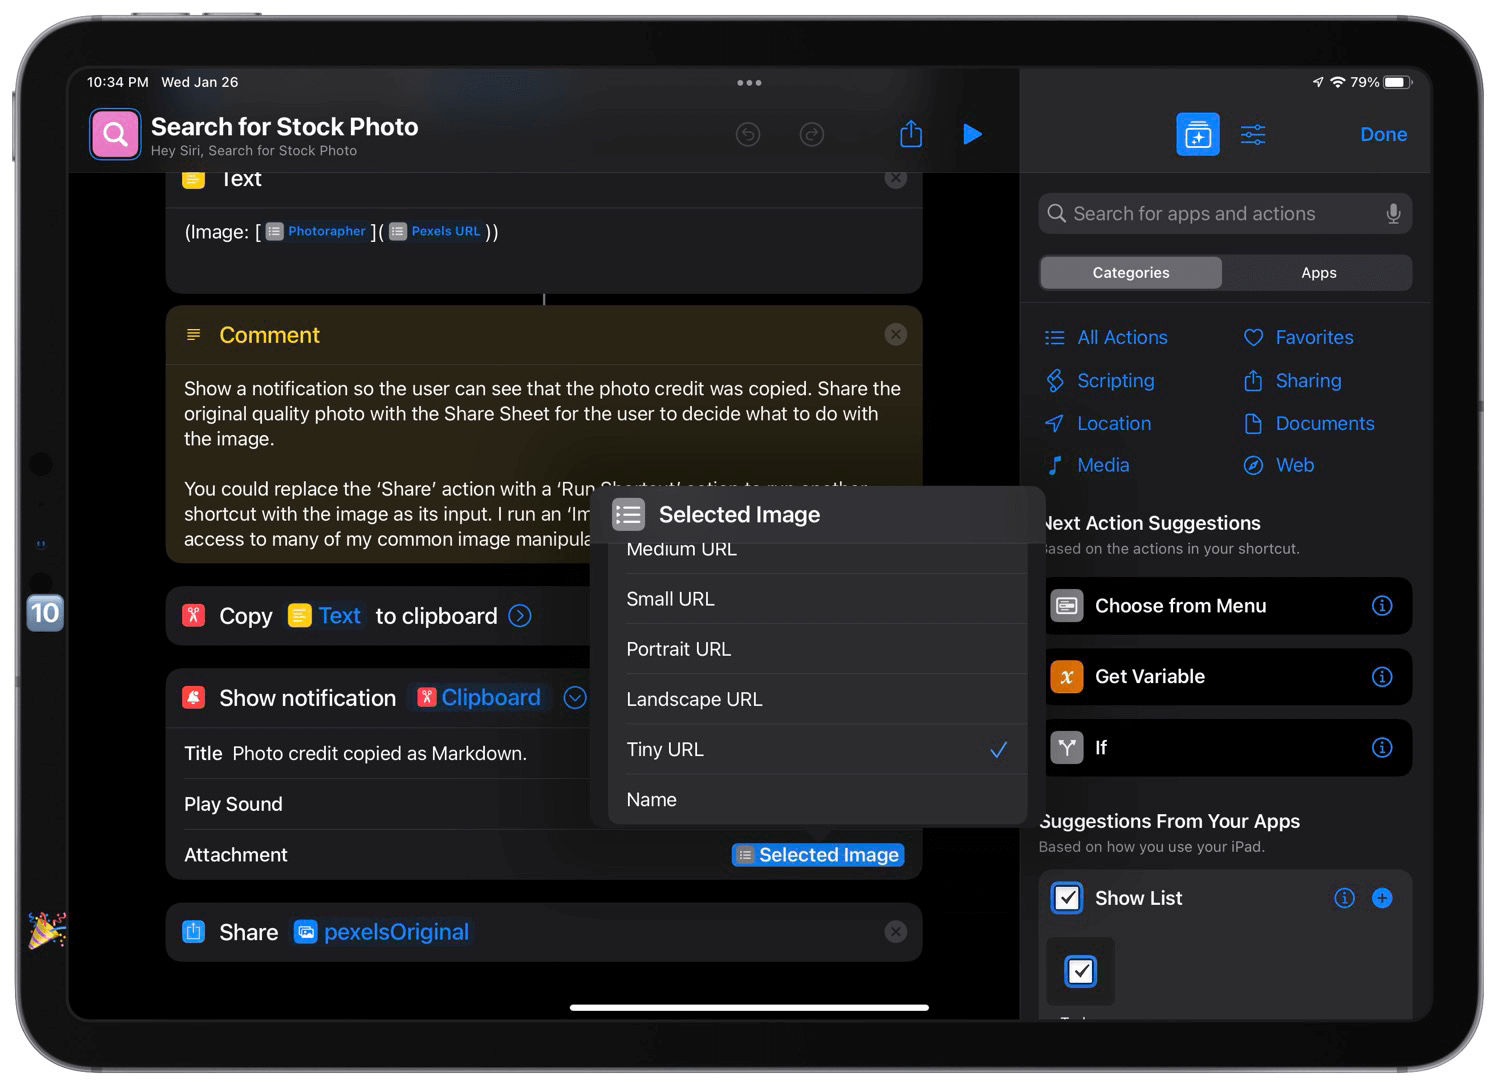
🔟 All that’s left is to copy that Markdown-formatted credit text to the clipboard, so it can be pasted alongside wherever the photo goes next. However, I hope you’ll notice that there’s something special about the notification I use to confirm that everything has finished as expected.
In addition to displaying the text just copied to the clipboard, the ‘Show Notification’ action lets you include an attachment. When adding the ‘Selected Image’ variable, we get a tiny image preview right in the notification. I’ve set it to the ‘Tiny URL’ parameter since it’s only going to be a small thumbnail anyway.
🎉 By grabbing the Magic Variable from our last ‘Get Images from Input’ action for this ‘Share’ action, you finally send it wherever you want next.
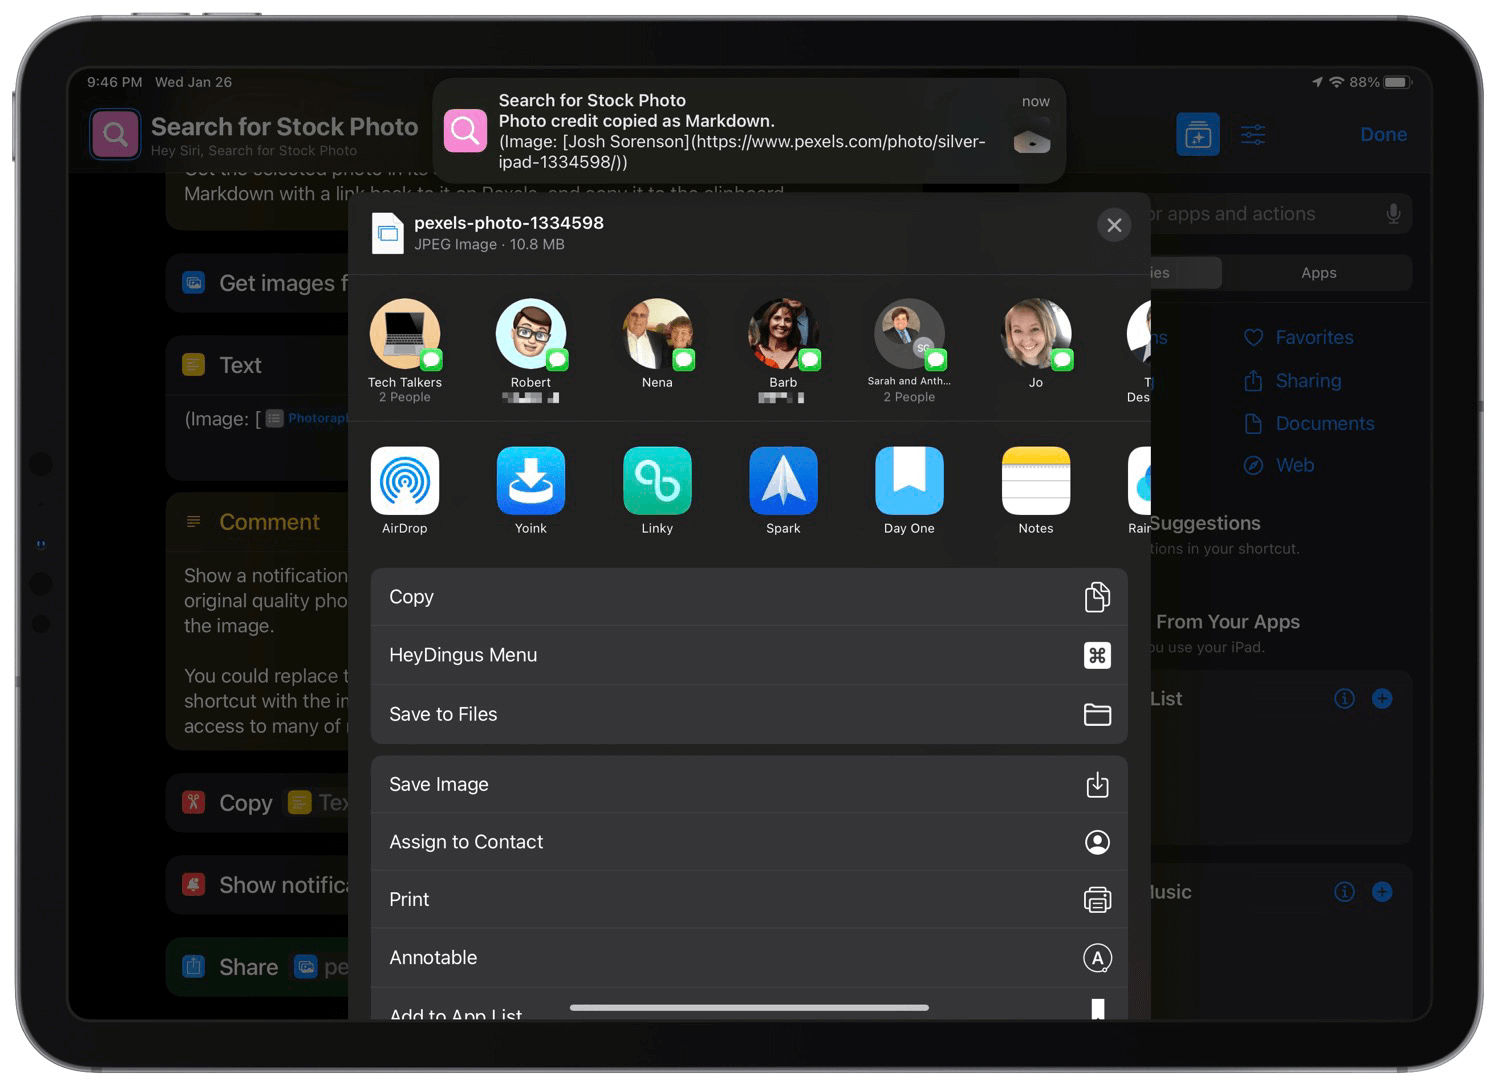
I say “finally”, but in reality, this whole shortcut runs in less than 30 seconds from start to finish — including typing in a search term and making a selection.

Get the ‘Search for Stock Photo’ shortcut → Original Version | Latest Version
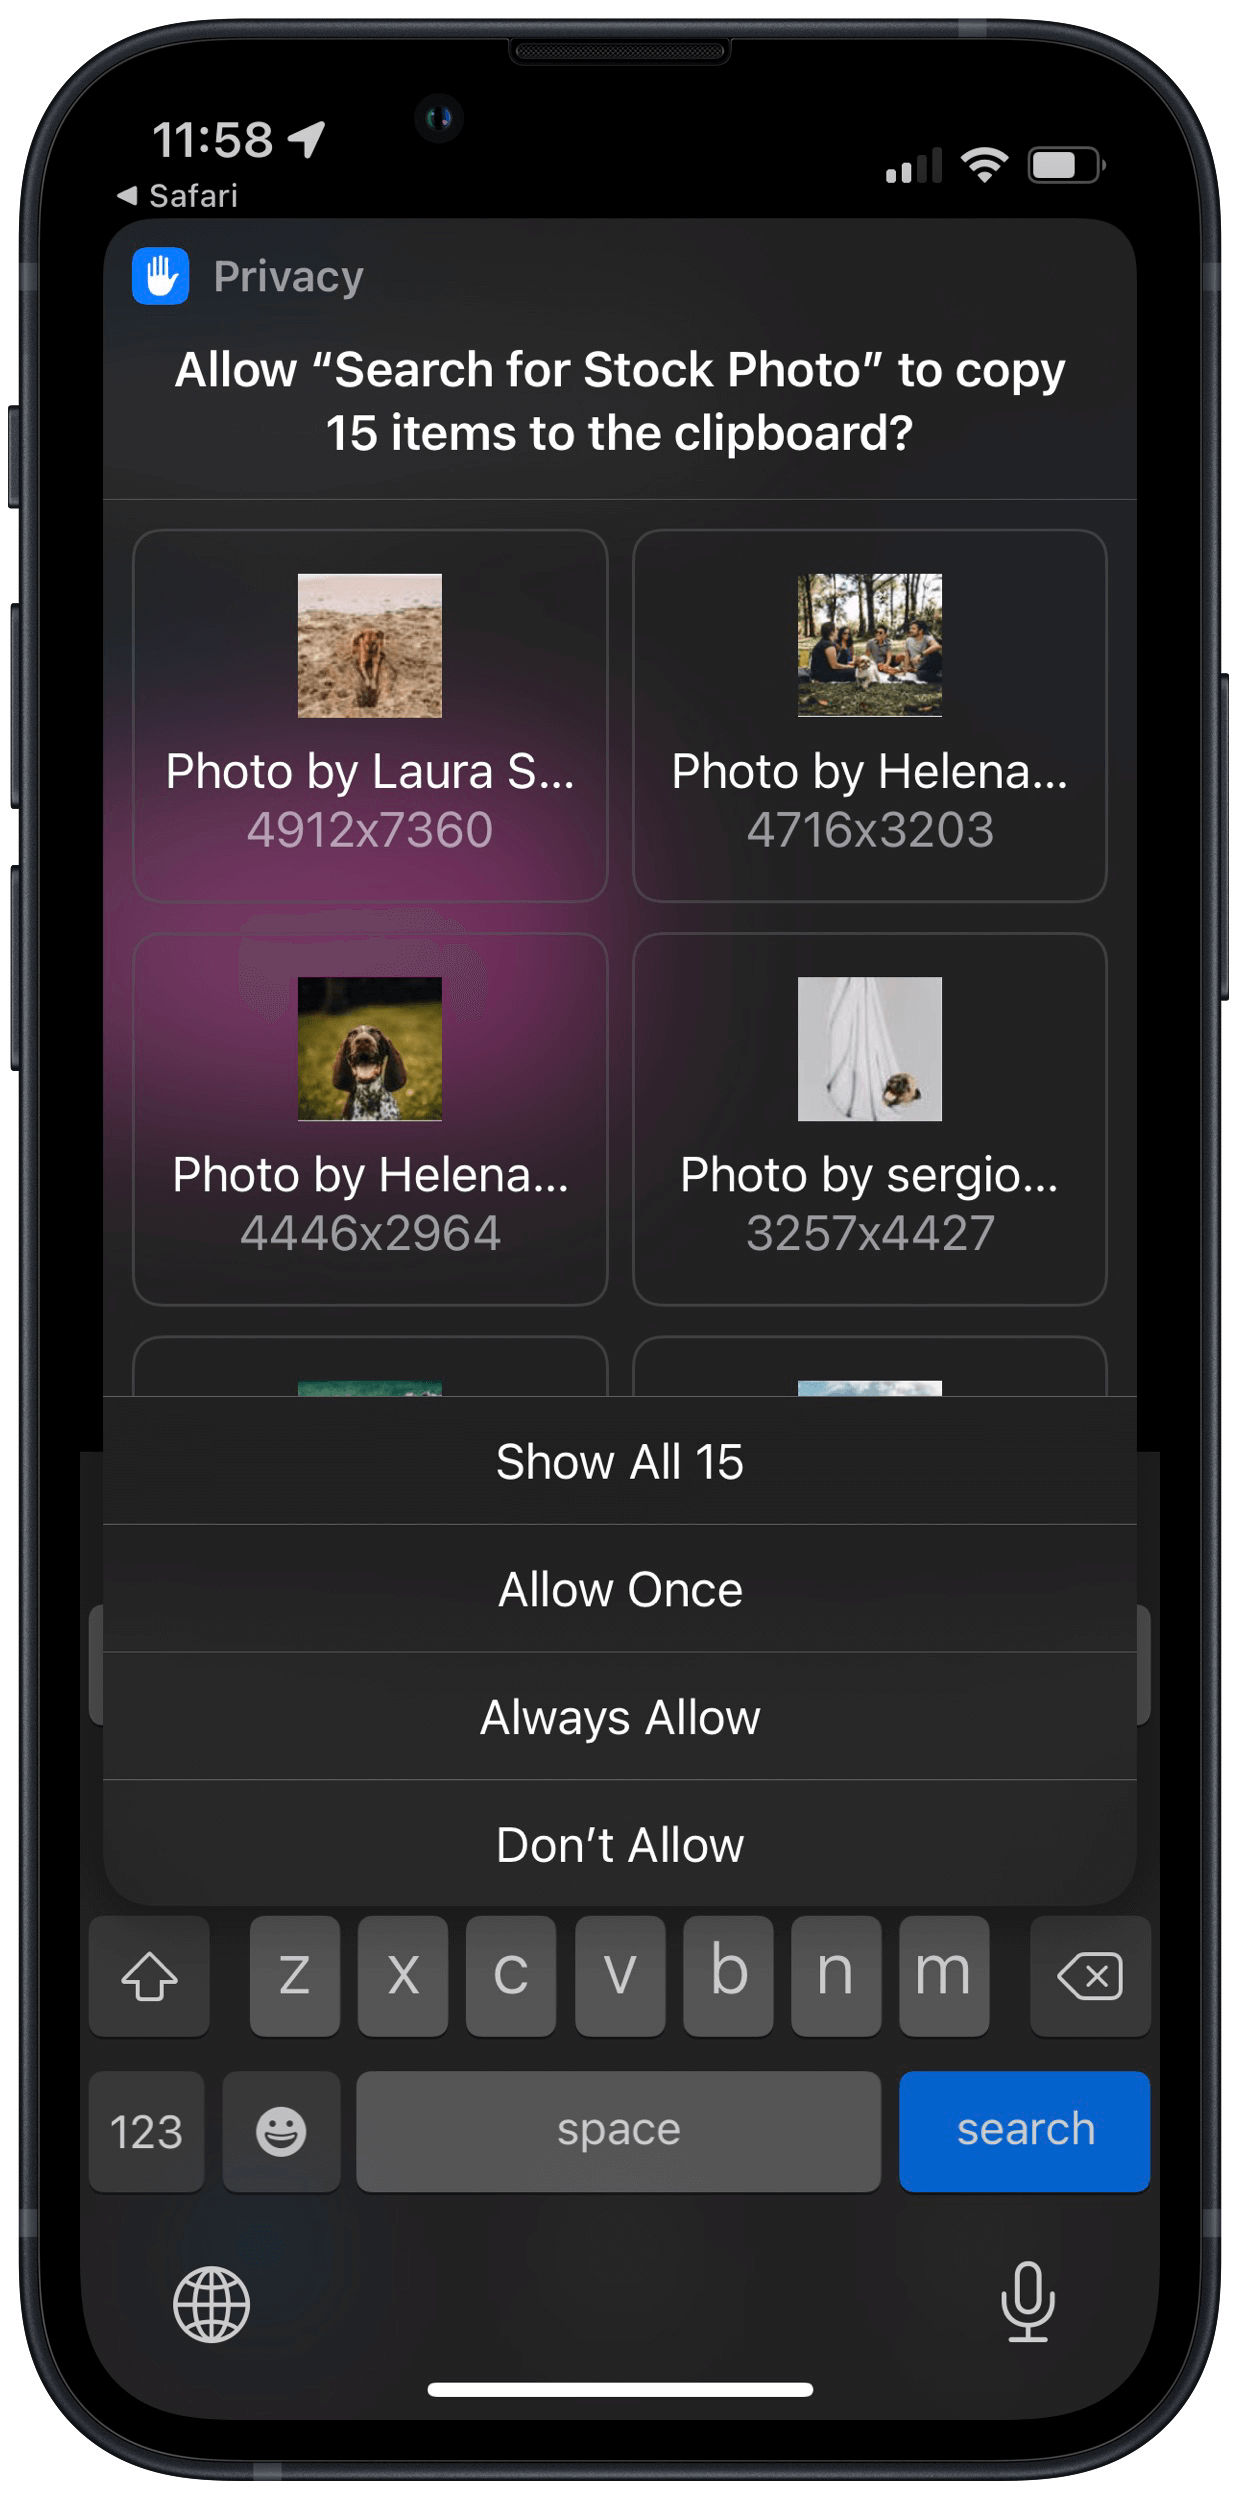
A brief note: When you run this shortcut for the first time, it will look like you’re passing along all of the search results and their metadata through the actions. I don’t know why it runs like that, but I can confirm that the result is only your selected image. If you choose “Always Allow”, you won’t see that weirdness again.
I’ve spent a lot of time testing and adapting this shortcut and had fun learning about some trickier techniques to get it just right. It’s amazing that you can build a tool like this that saves you from browsing through websites to download files and copy things endlessly back and forth. I look forward to using it to spruce up my blog posts, and I hope you’ll get some use out of it, too.