Wordle continues to be part of the zeitgeist weeks after it exploded in popularity — in large part due to its ingenious built-in sharing mechanism. Honestly, Wordle’s 15 minutes of fame have far outlasted my expectations, but I’m glad! I love Wordle, and haven’t missed (or failed!) a day since I started playing.
Almost as soon as Wordle made Twitter’s trending lists, people started discussing the accessibility, or lack thereof, of those colorful emoji squares that have become iconic to the game. While they’re fun and mysterious to look at while scrolling your timeline, those emojis are not very inclusive for people who use screen readers to engage with content.

The first stab I saw at making Wordle tweets more accessible came from Zach Knox, who made the Wordle Normalizer shortcut. This simply replaces the yellow squares (🟨) and green squares (🟩) in the shared text with different emojis (🟡 and ✅) so that they are differentiated for people who have more trouble distinguishing colors. Everything else about the text stays the same, which means it didn’t solve the screen reader issue.
Federico Viticci went further with WordleBot, which automatically added plain text to the end of each row of emojis, describing the game’s progress line-by-line. He quickly found, though, that just adding text next to the emojis still didn’t solve the accessibility problem since screen readers would continue to read out each emoji square. A clever update to WordleBot added the ability to export the emoji to an actual image that could include Alt Text — the gold standard for describing pictures for screen readers.
But I thought I could take it one step further with a few tweaks to Federico’s shortcut. I’ve combined the best of both Wordle Normalizer and WordleBot to make a more complete solution for those who can see the emojis and those who use screen readers. It keeps the mechanics of WordleBot, but before converting the grid to an image, it replaces the colored squares with their more distinguishable counterparts from Wordle Normalizer. I also added a couple of quality-of-life enhancements that smooth out the sharing flow, which I’ll describe below.
Get the ‘WordleBot’ shortcut → My Original Version | Latest Version
Building It Better
First things first, when I share my Wordle results, I like to take advantage of the power of the hashtag, so I replaced “Wordle” with “#Wordle” in the first line of text. That gets saved for later use to put together the final shared text.
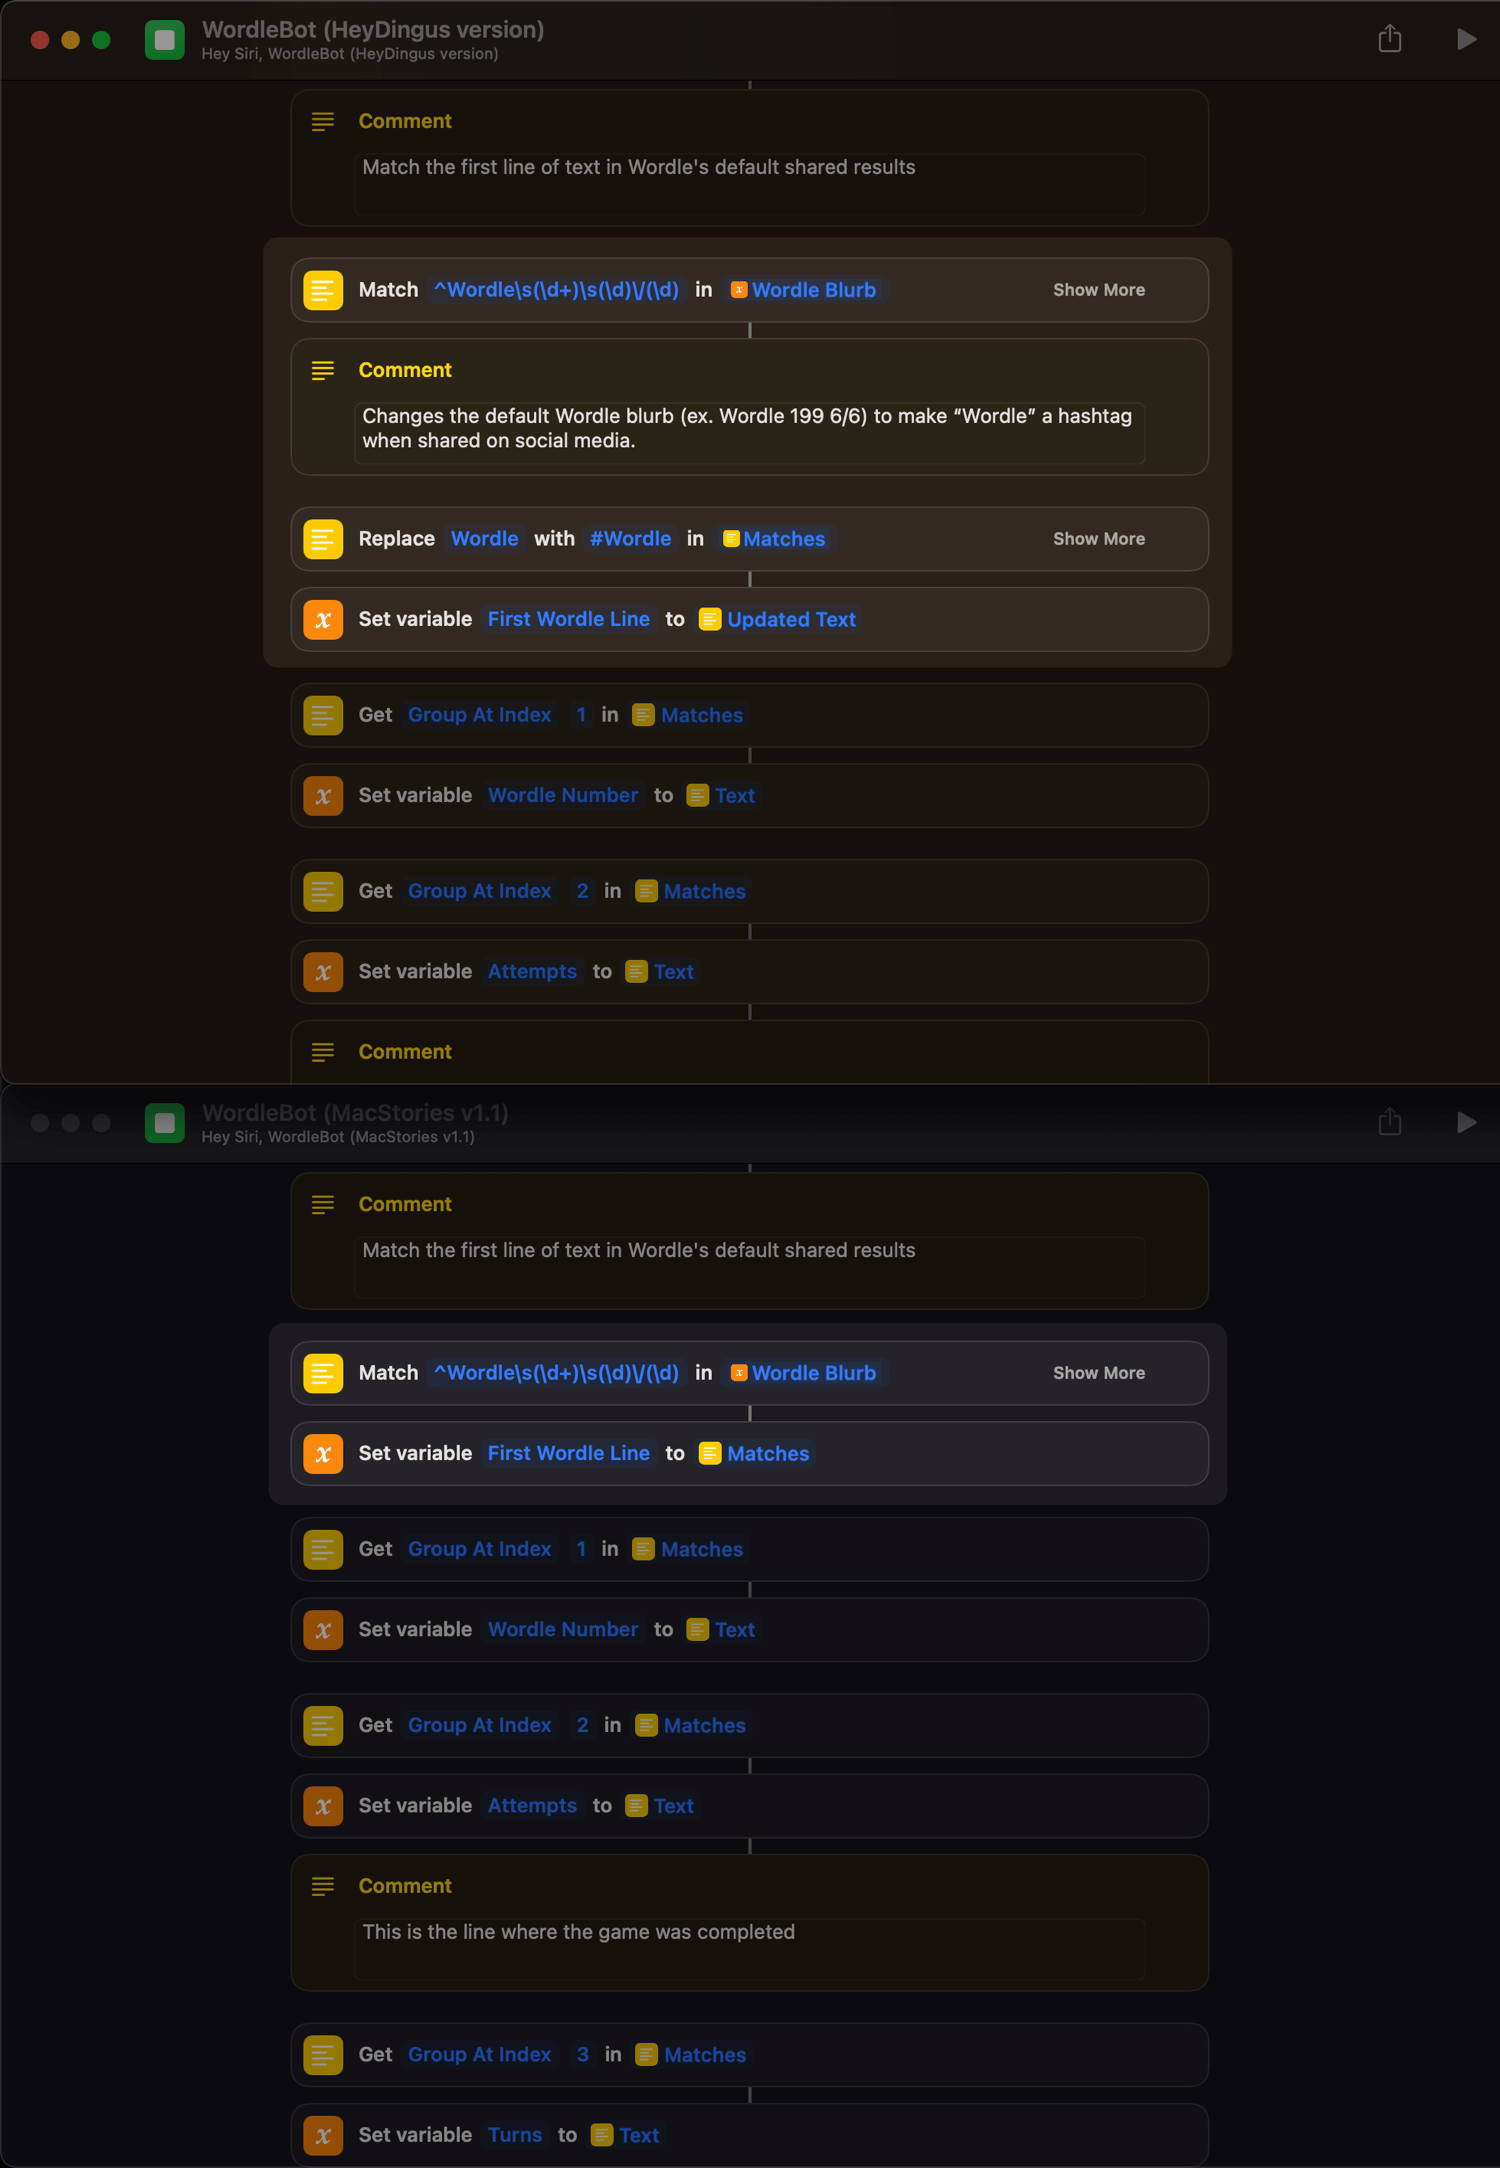
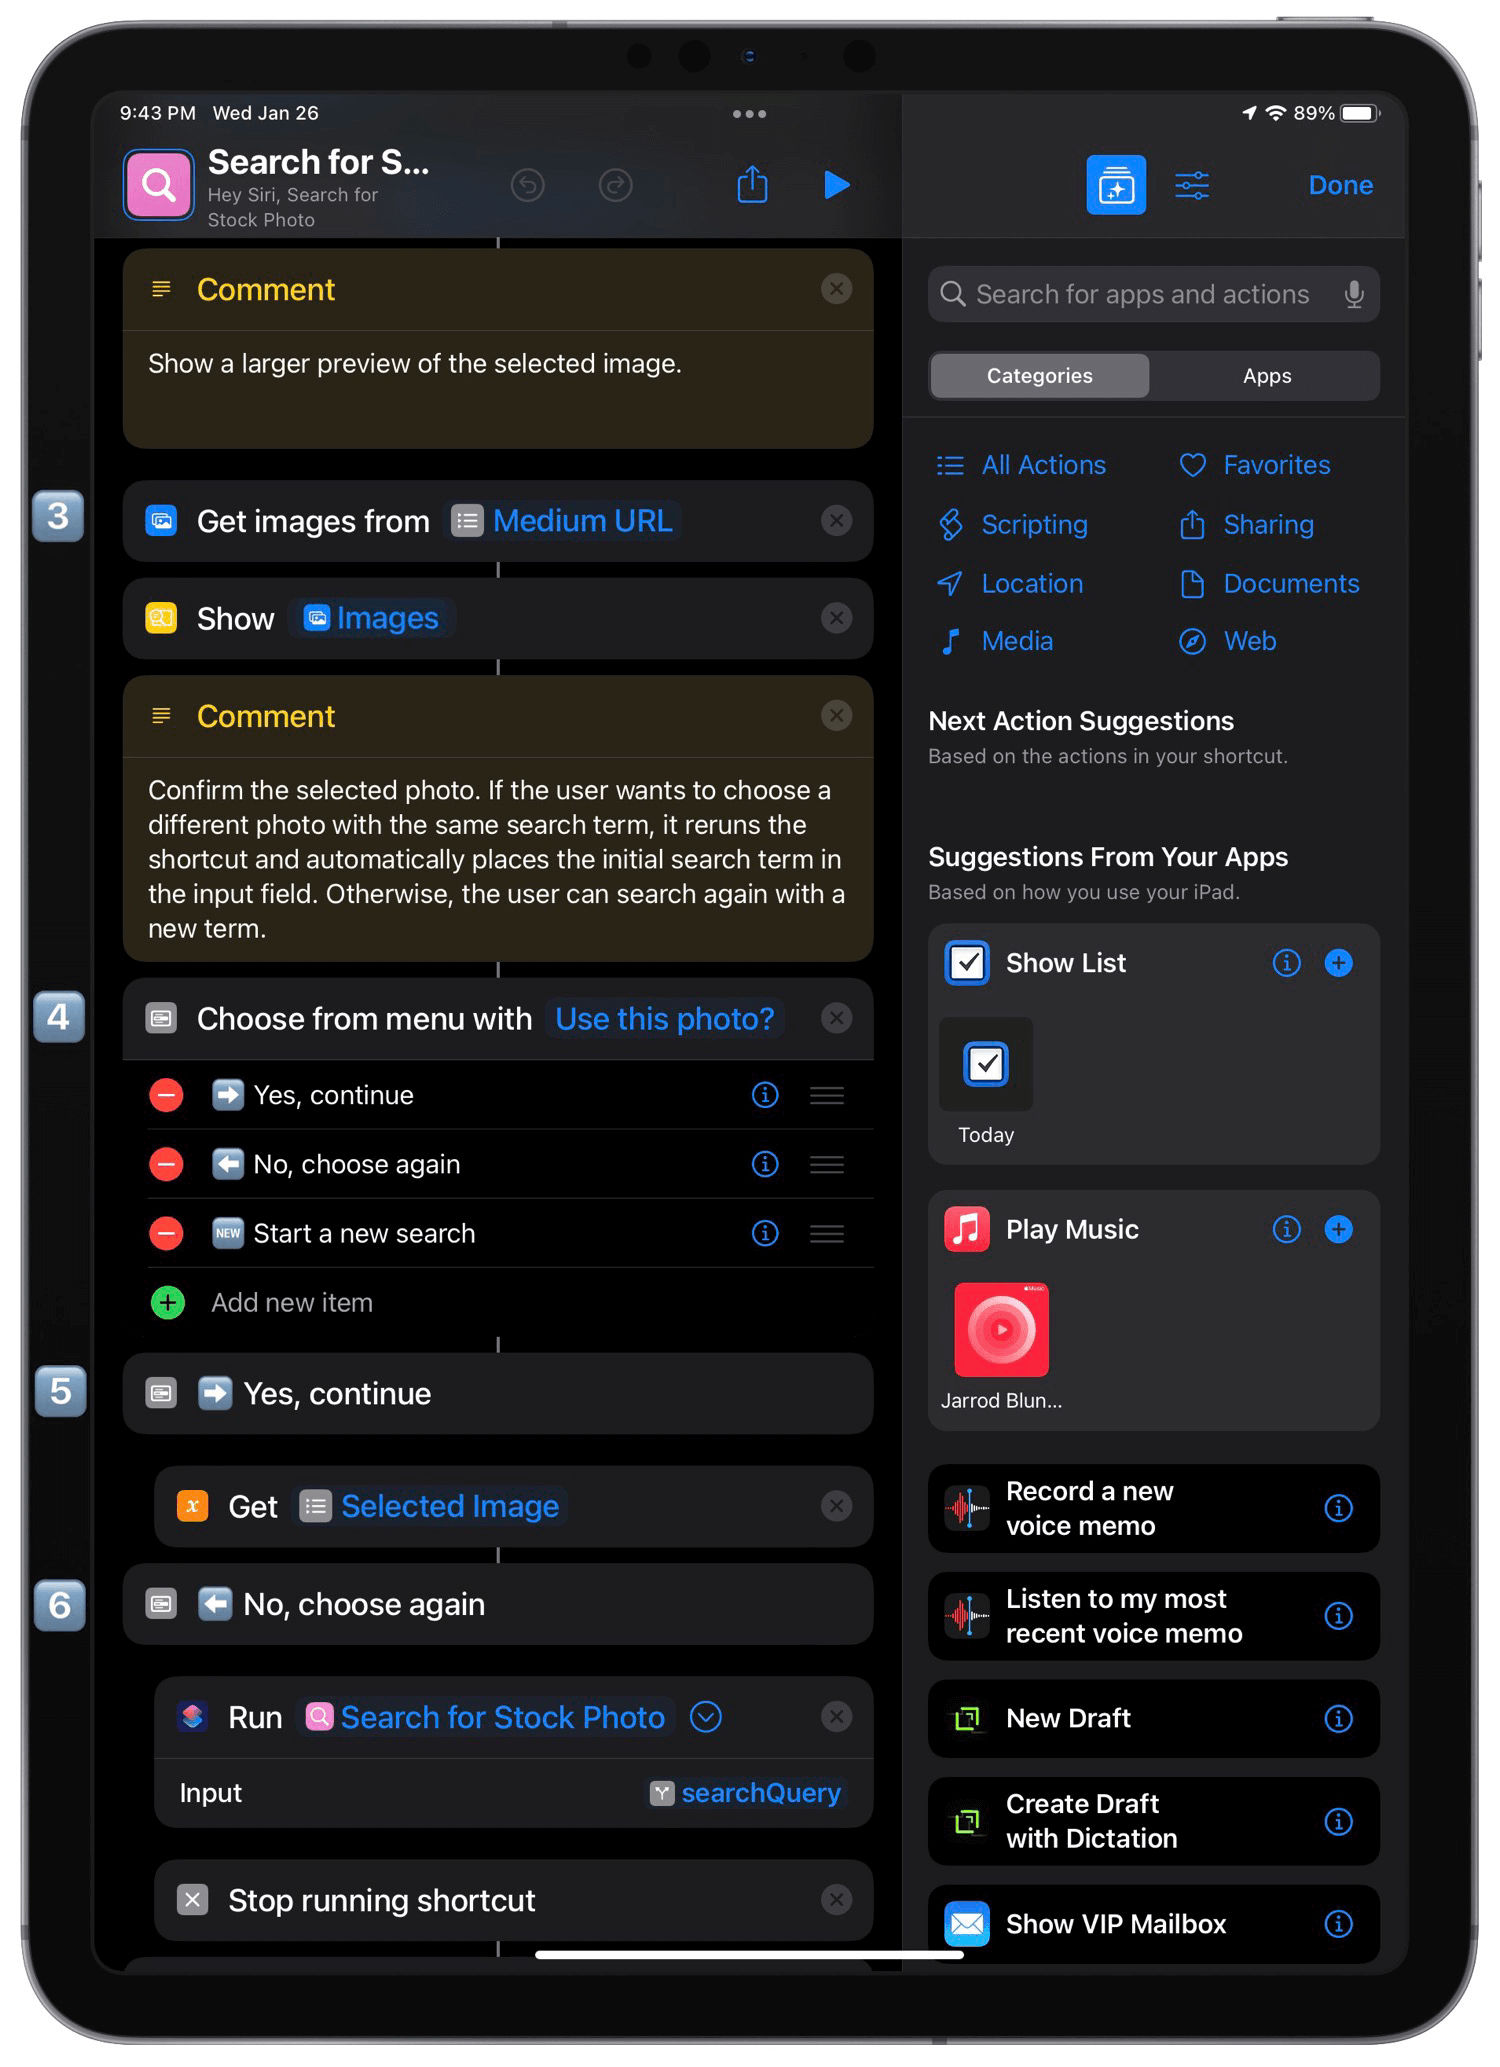
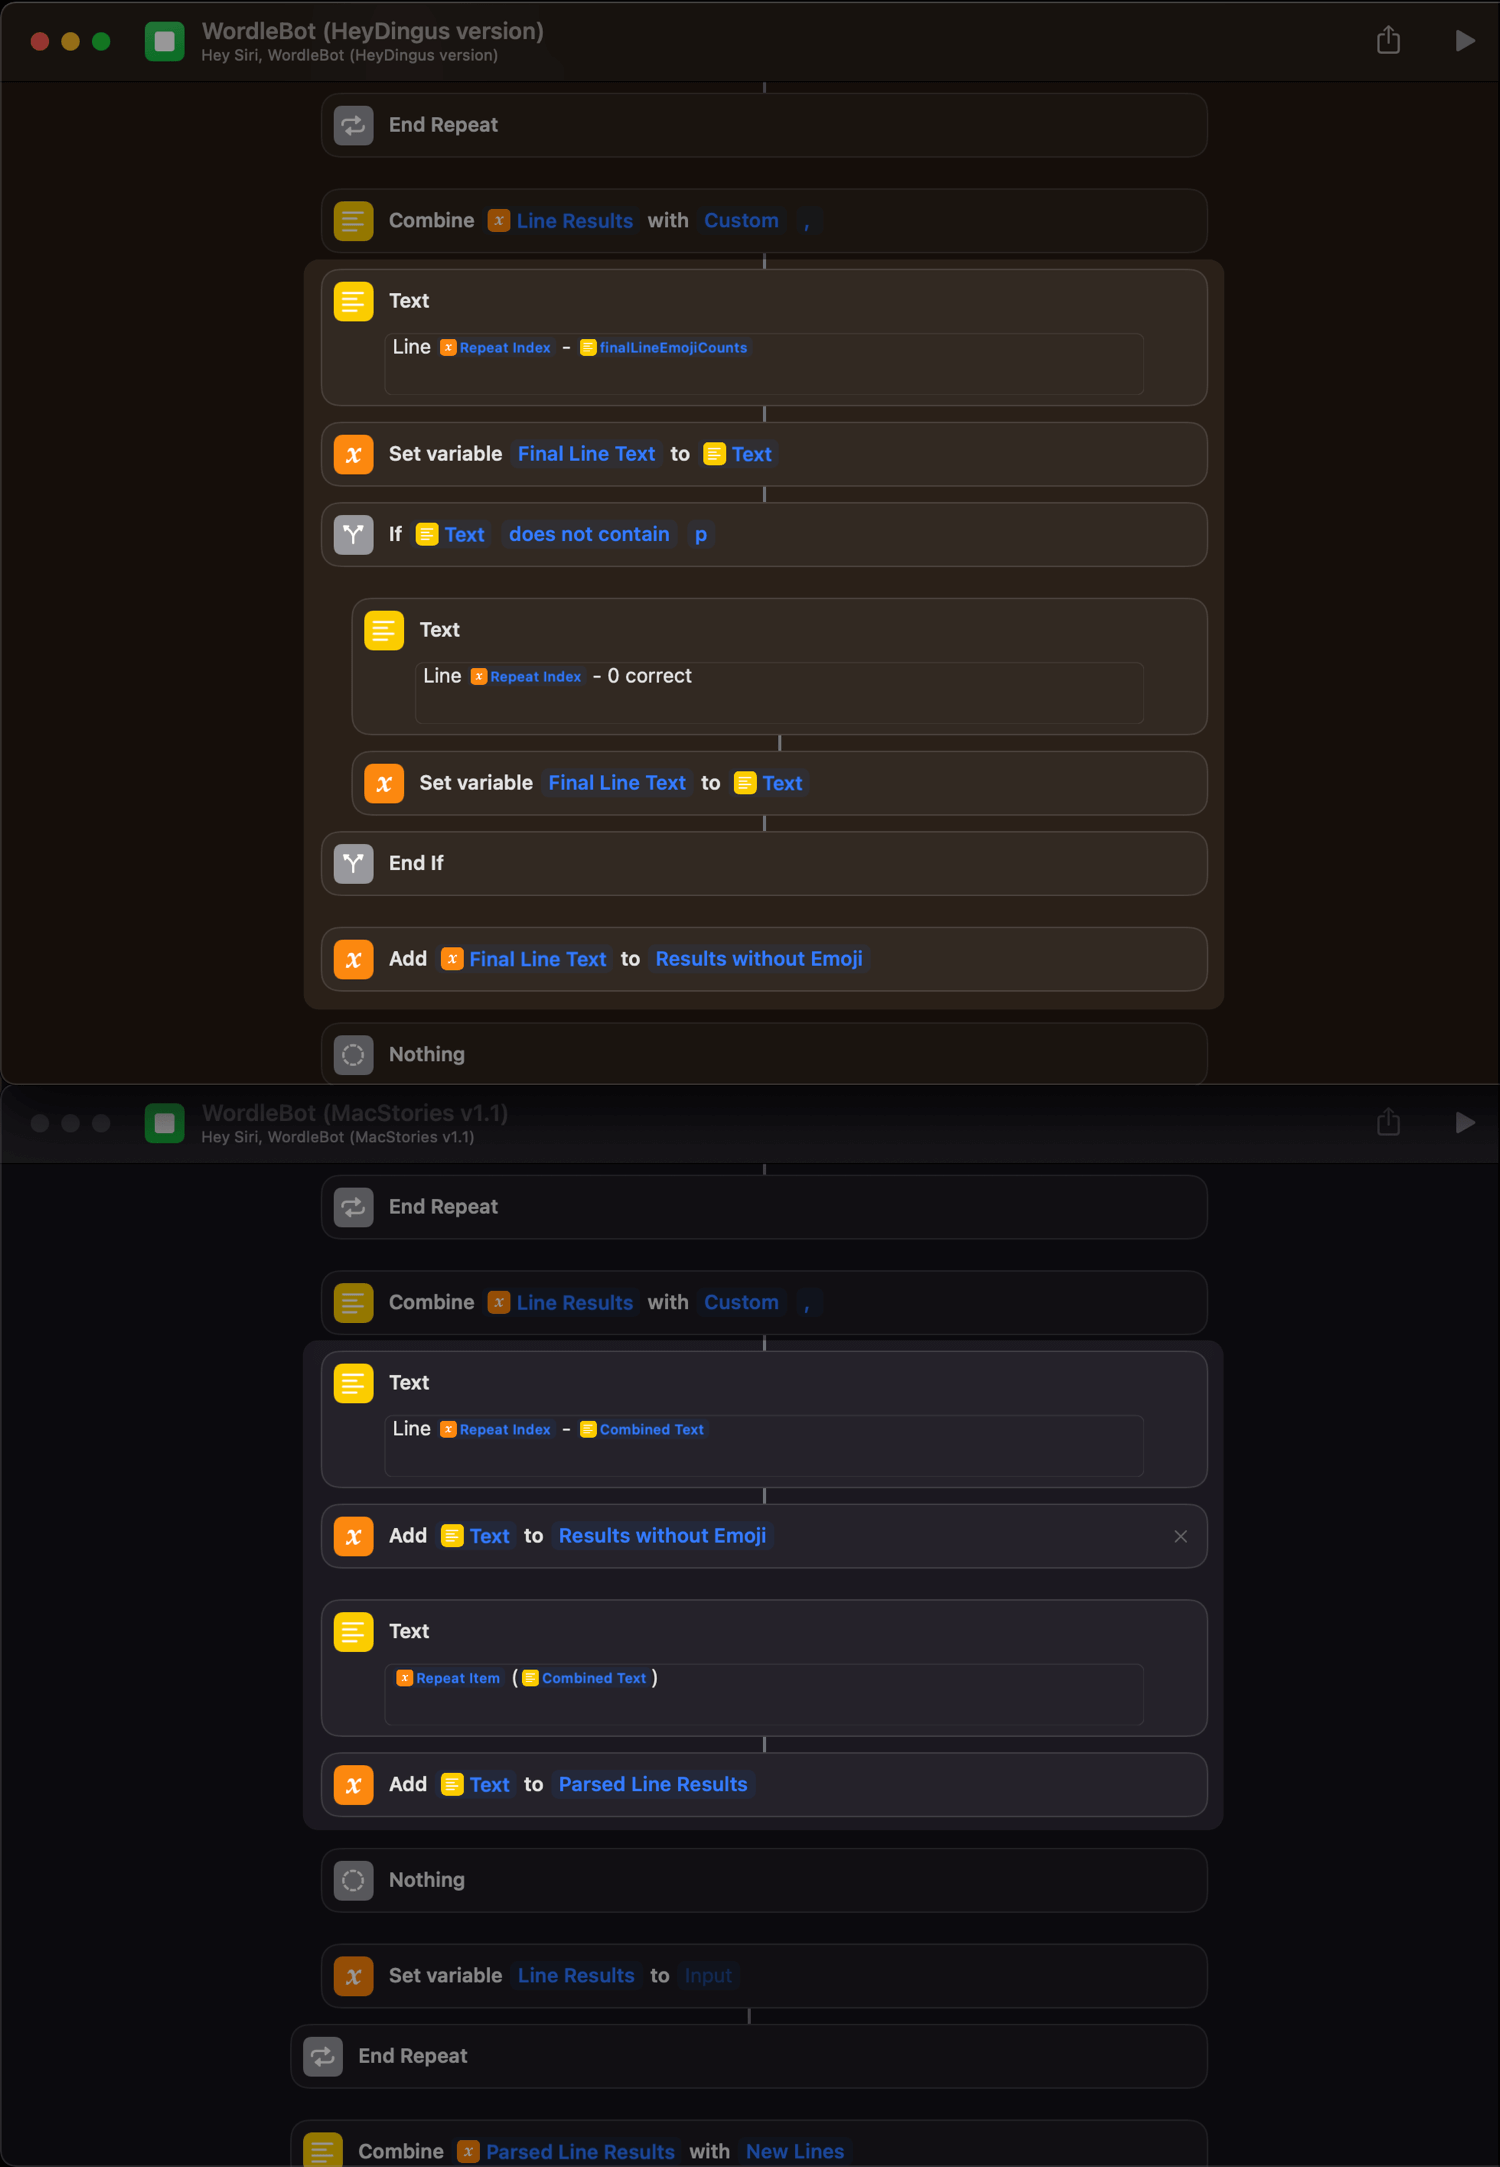
I left all of Federico’s ReGex alone to match and tally up all the line results. Those results get formatted into the line descriptions that will be used as the Alt Text (e.g., Line 1 - 2 partial, 1 perfect). However, I realized that there was no description given to lines that had neither partial nor perfect matches — it was just blank. I used an ‘If’ action to check for a letter that would be present in either case, “p”, and if it isn’t found, then it replaces the line to show that 0 letters were correct.
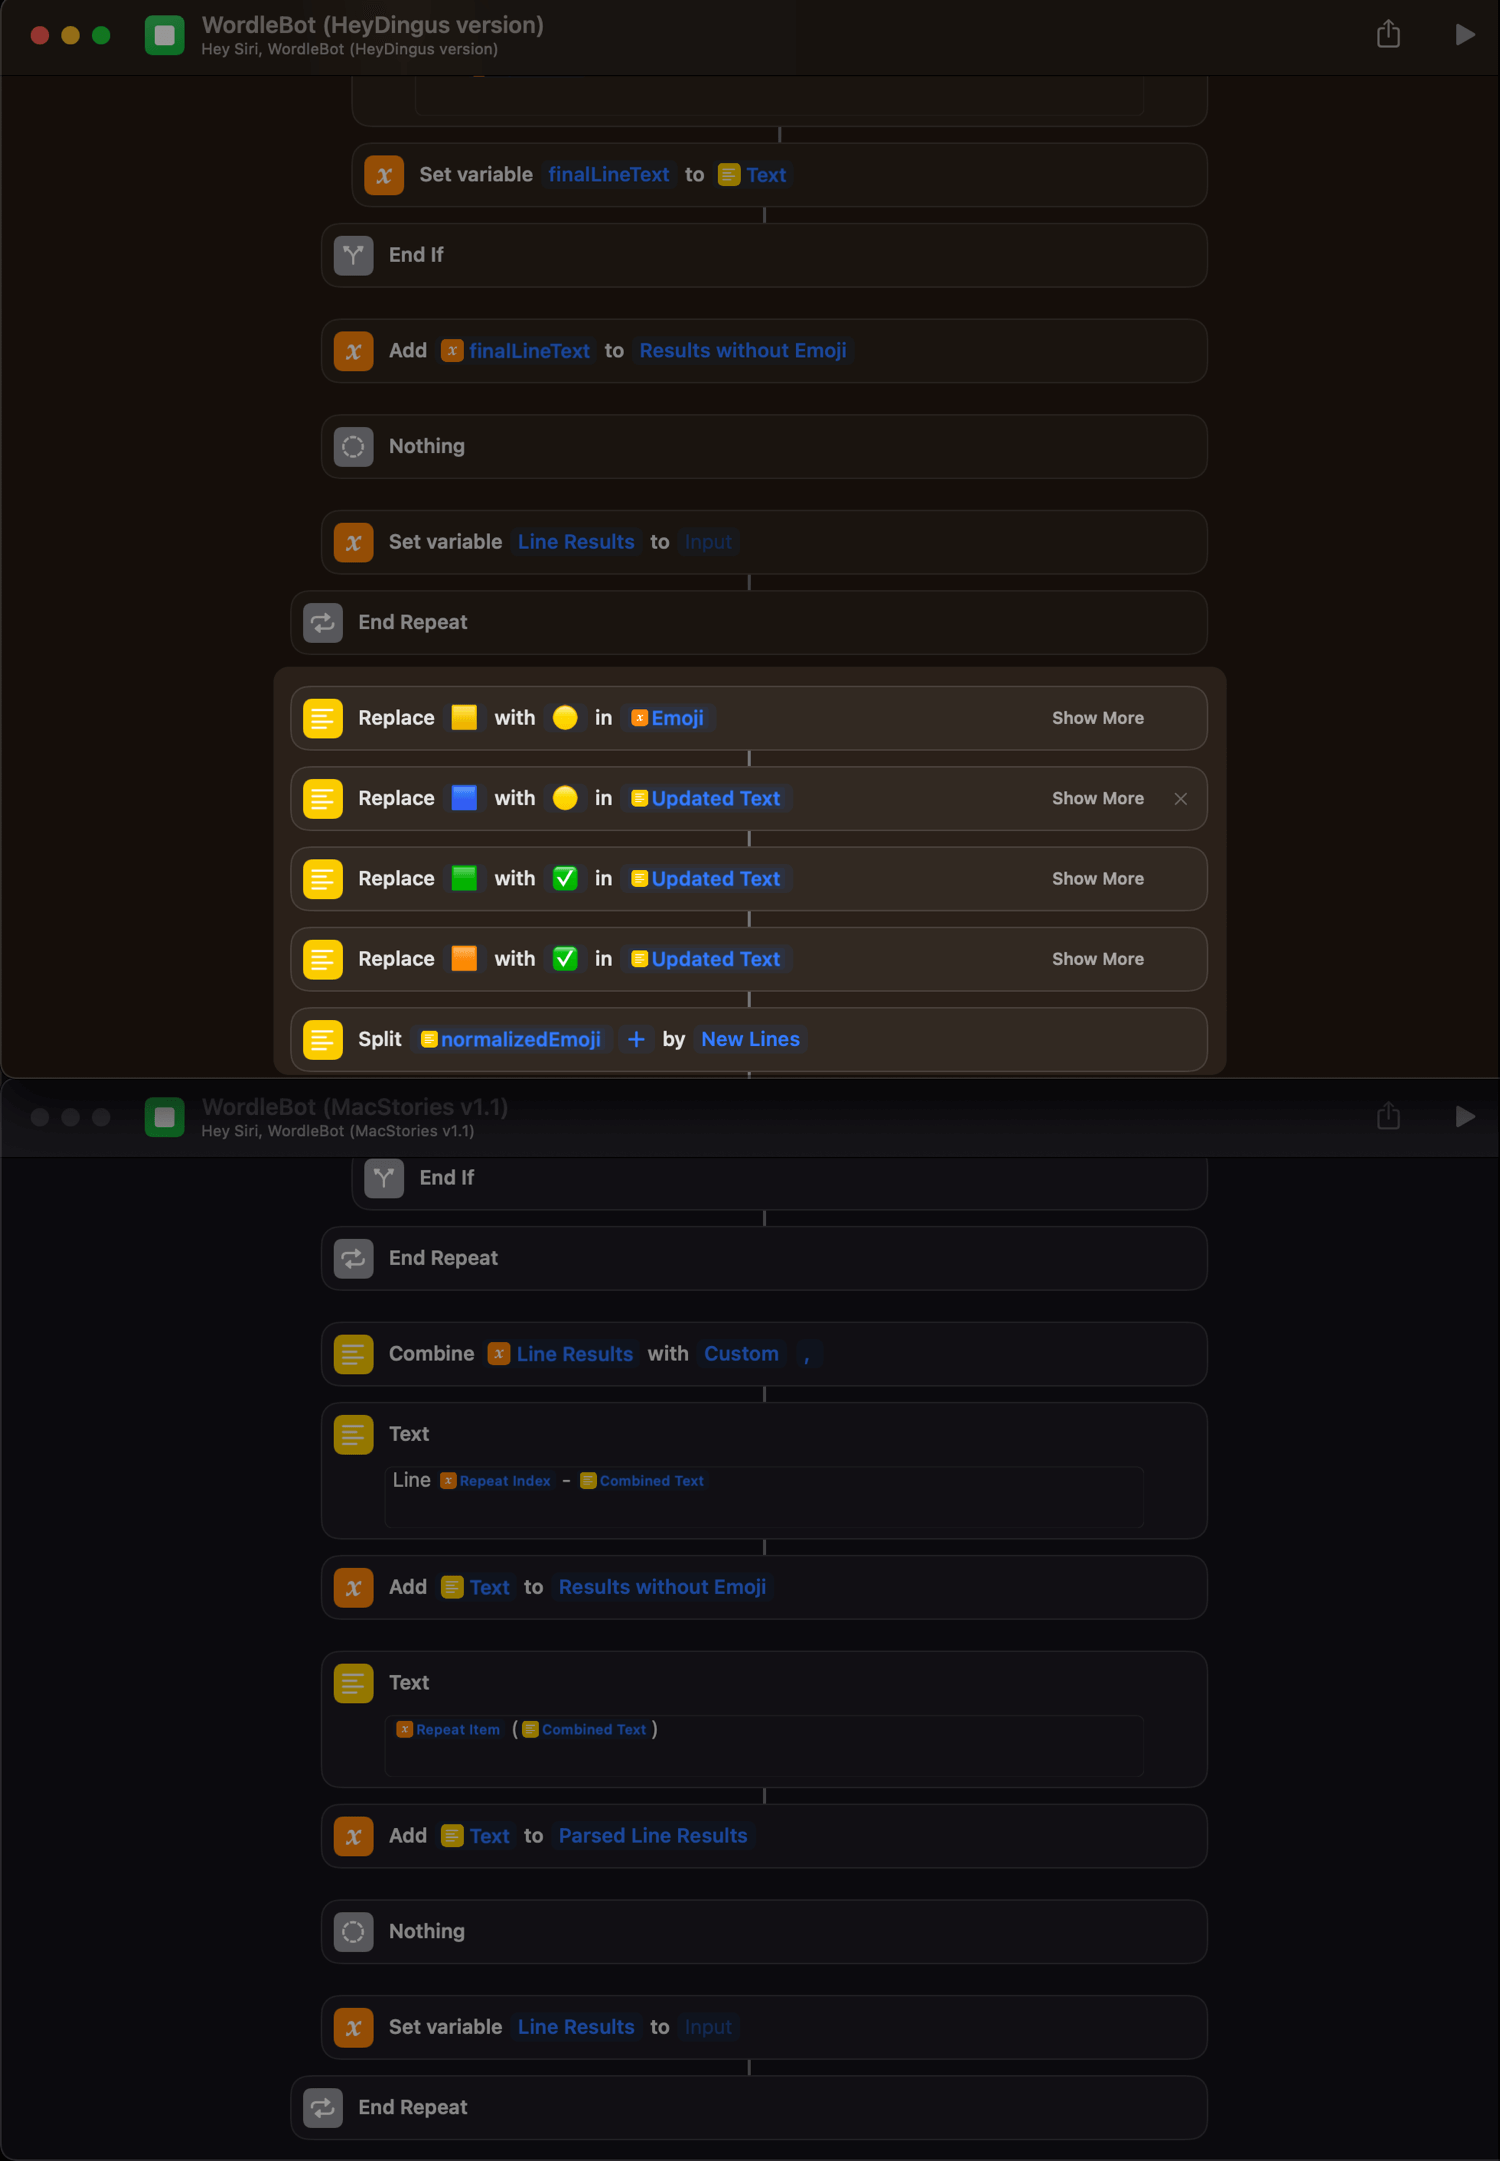
Once the line text is saved as a variable, I replace the standard square emojis with their alternate shapes inspired by Wordle Normalizer.
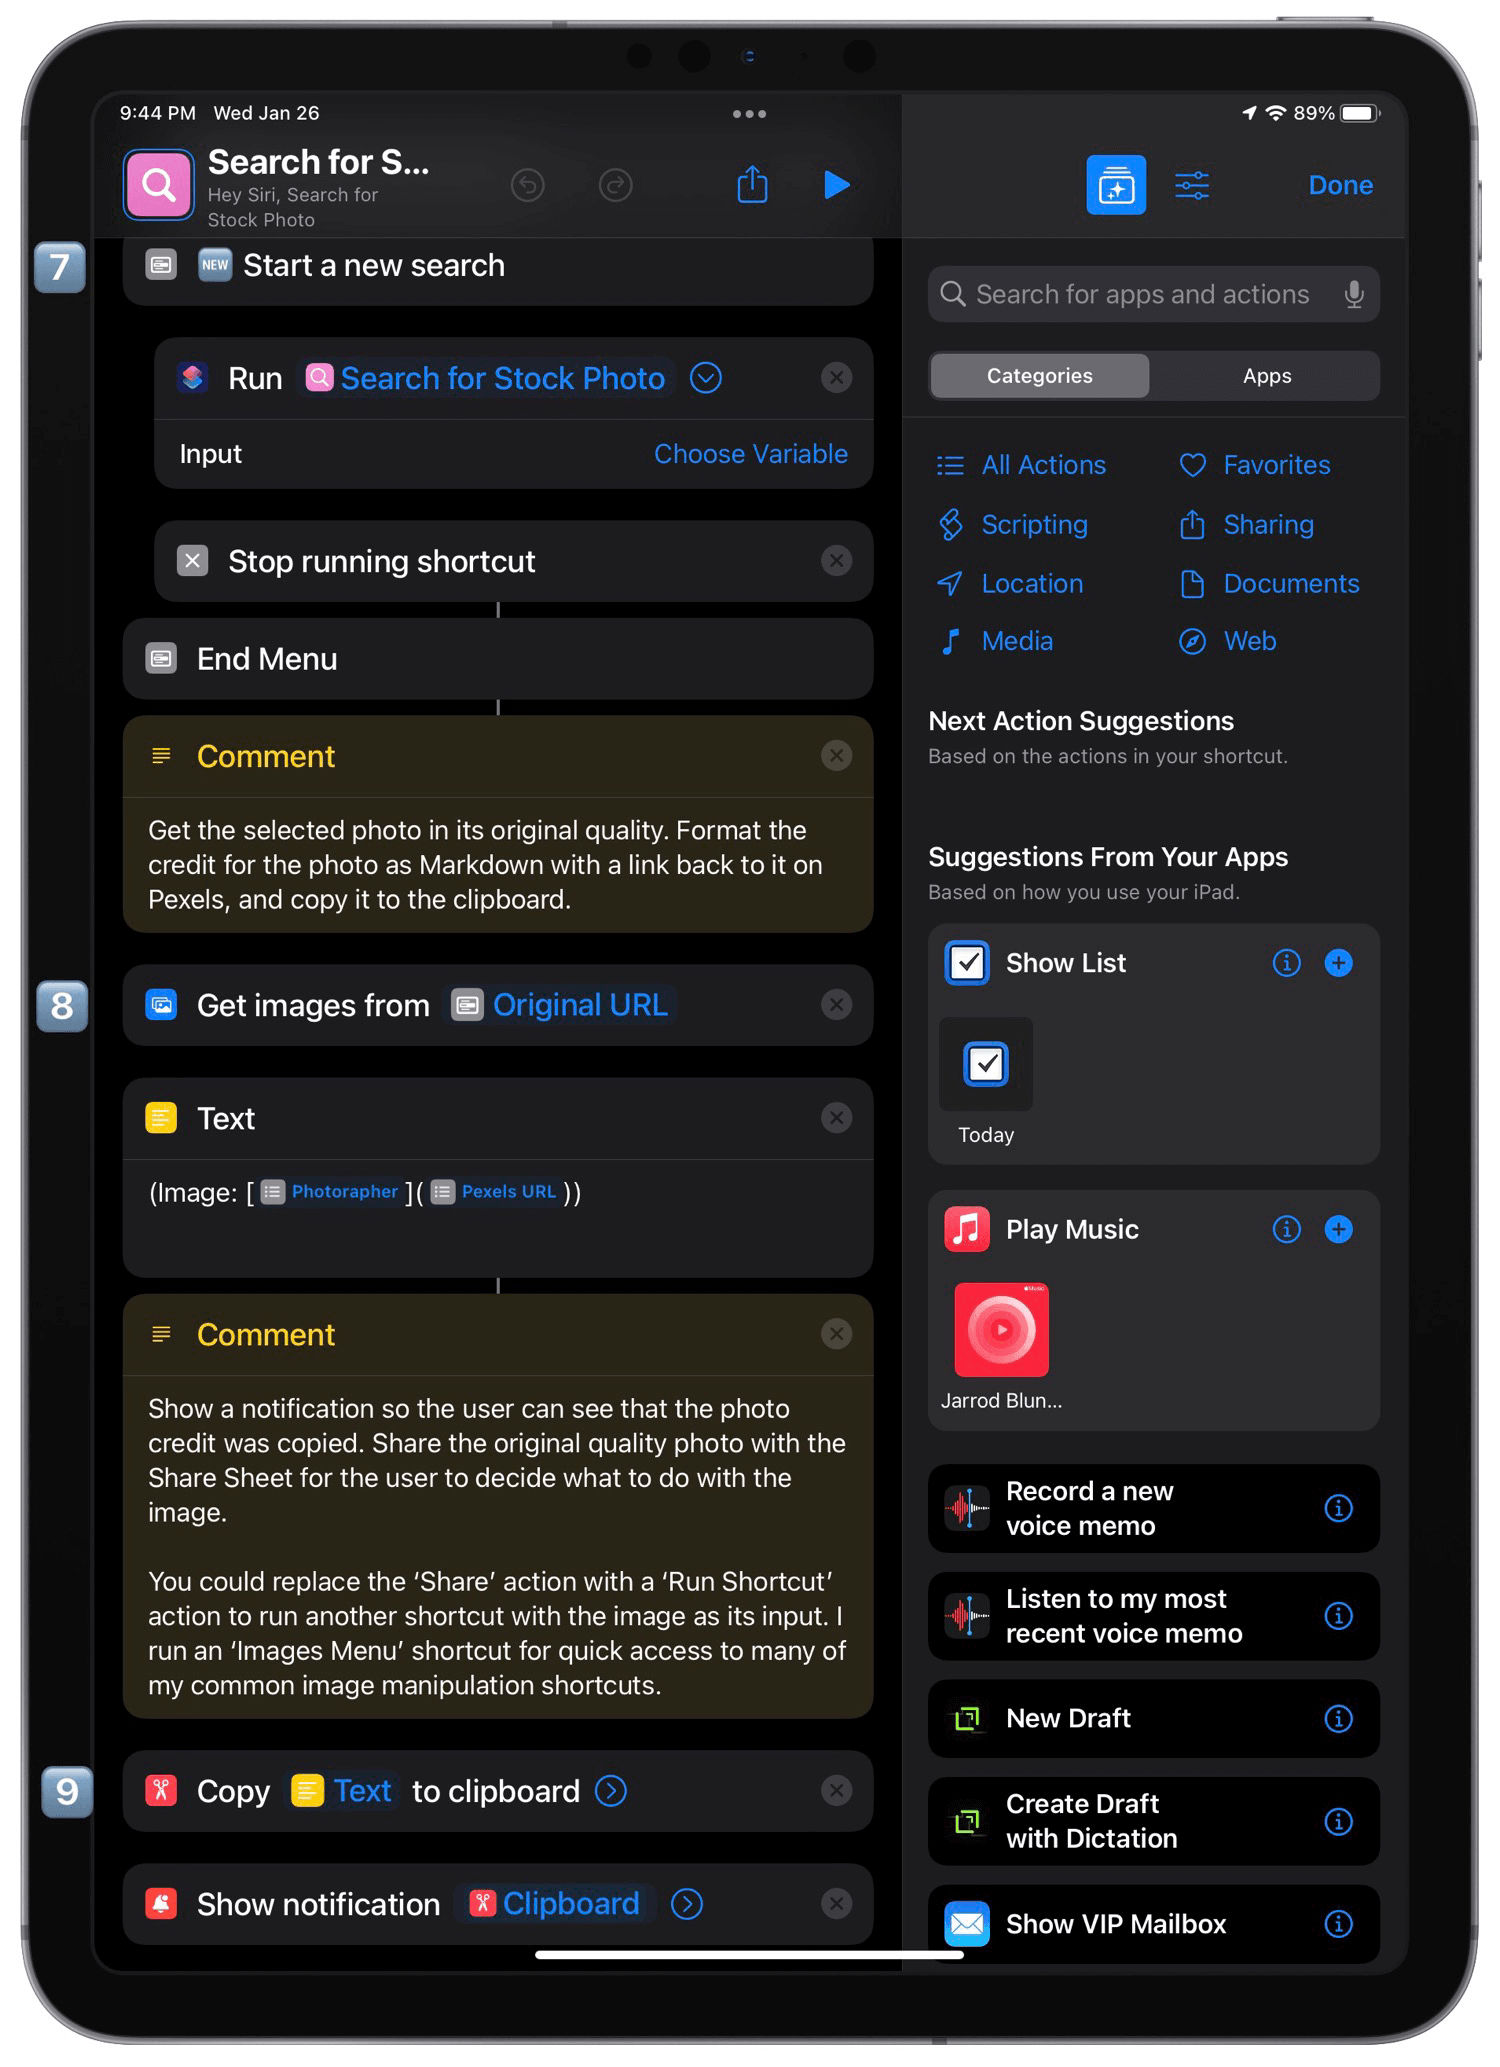
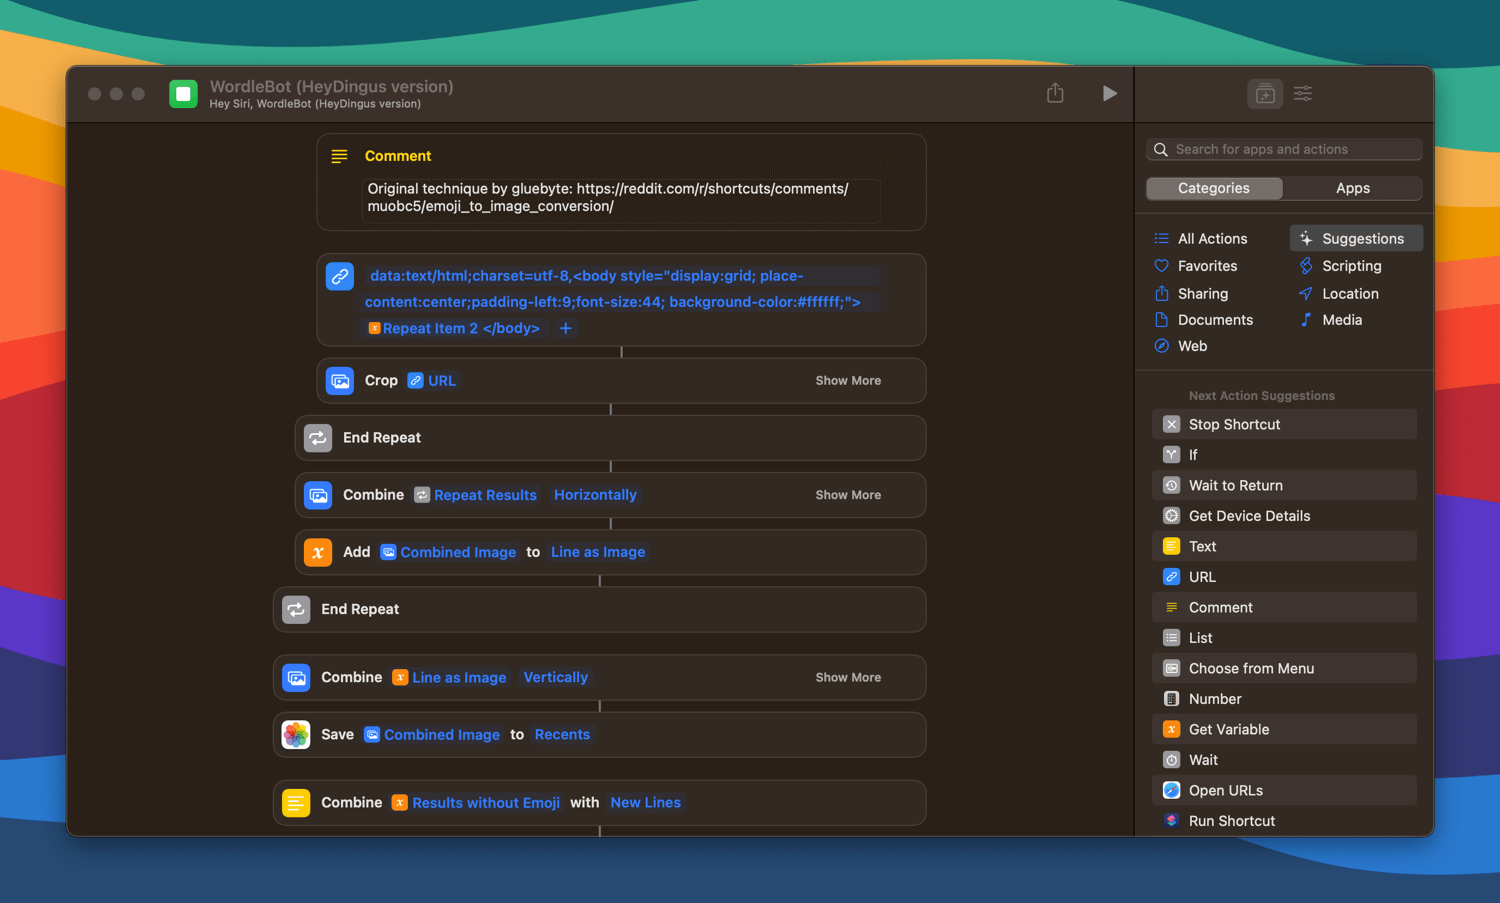
I only ever want to share the image version of the puzzle grid with Alt Text, so there was no reason to keep the extra actions for copying the original emojis. I removed that ‘Choose from Menu’ and its associated actions. Luckily, Federico’s technique for converting emoji to images still works perfectly, even with the new emoji shapes.
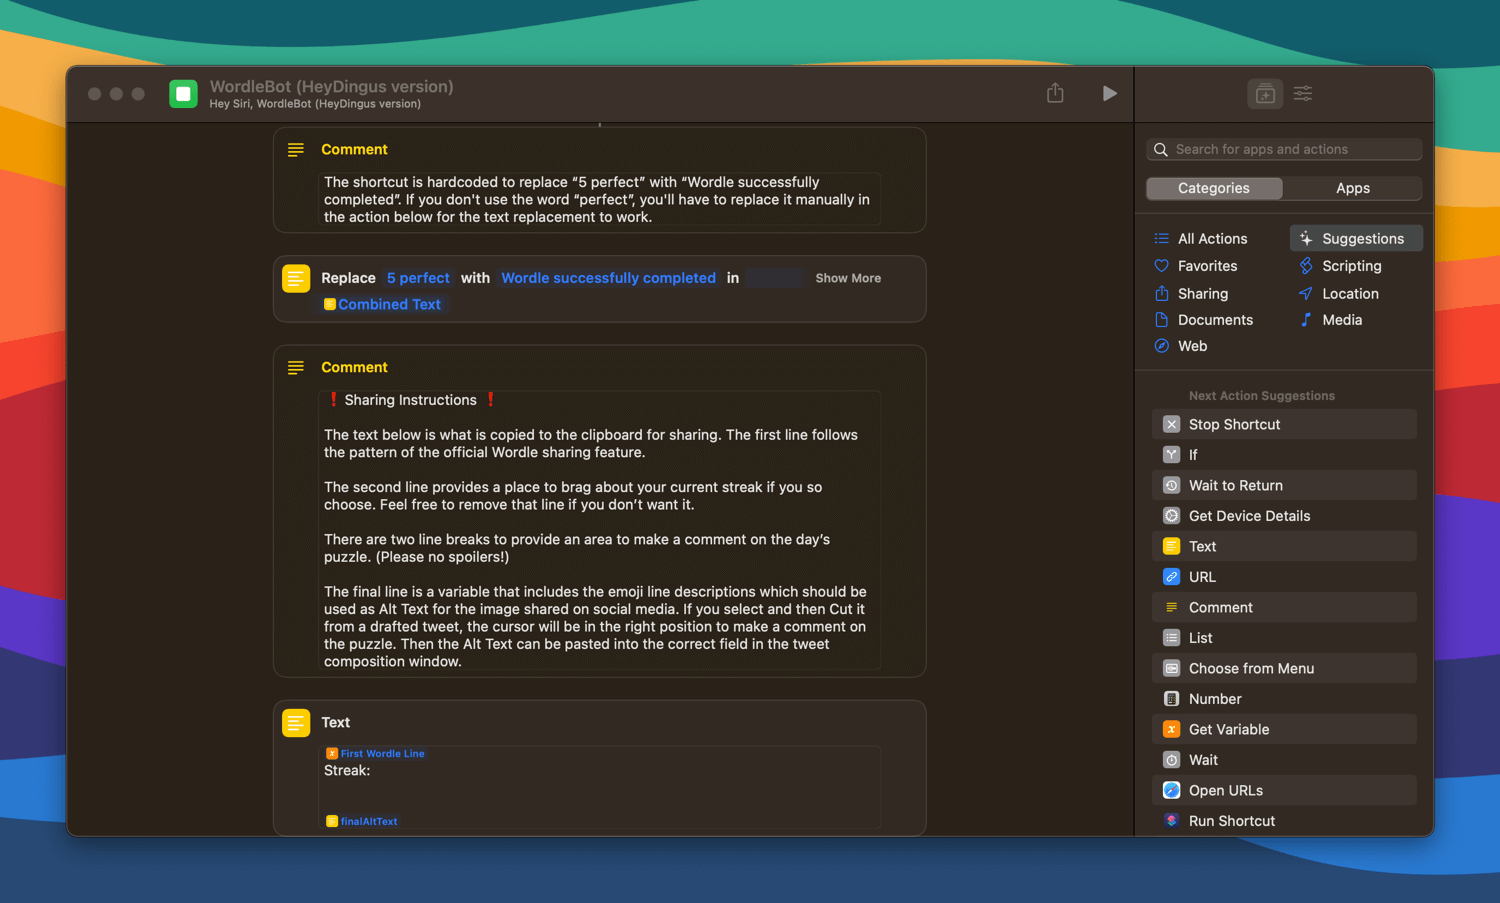
I realized in the original WordleBot that only when sharing the text/emoji version, not the image one, would “5 perfect” be replaced with a phrase confirming puzzle completion. I fixed it, so the Alt Text also gets that same treatment. I also added an explainer for how users can customize the text that ultimately gets shared and use the Alt Text.
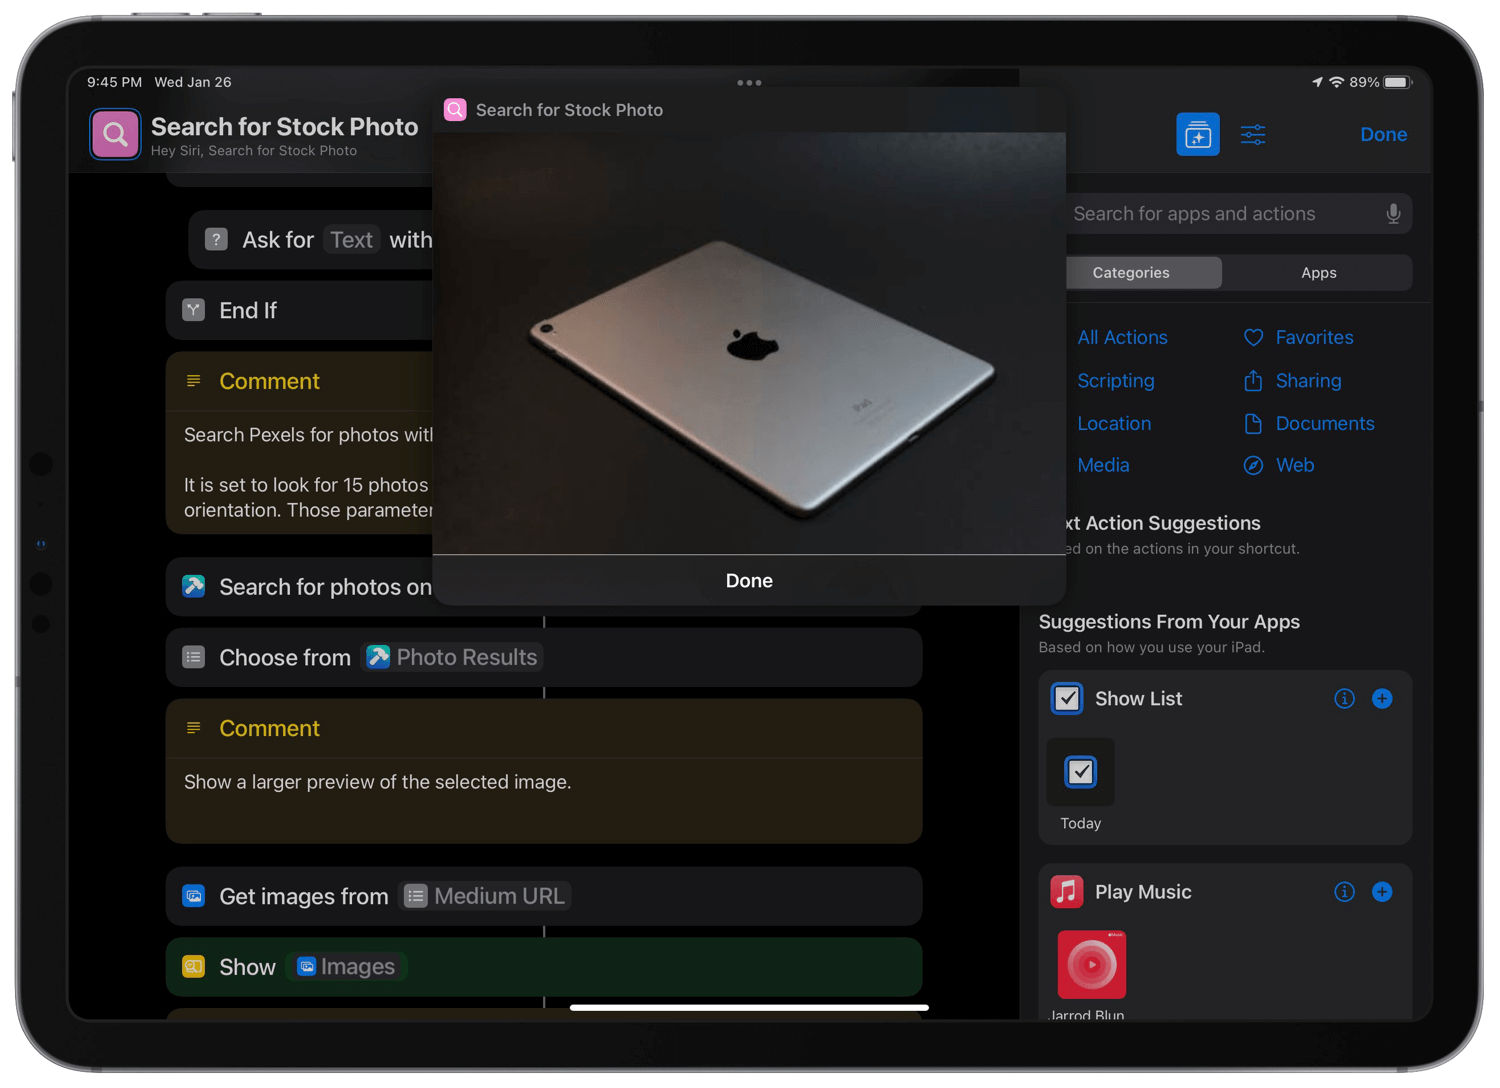
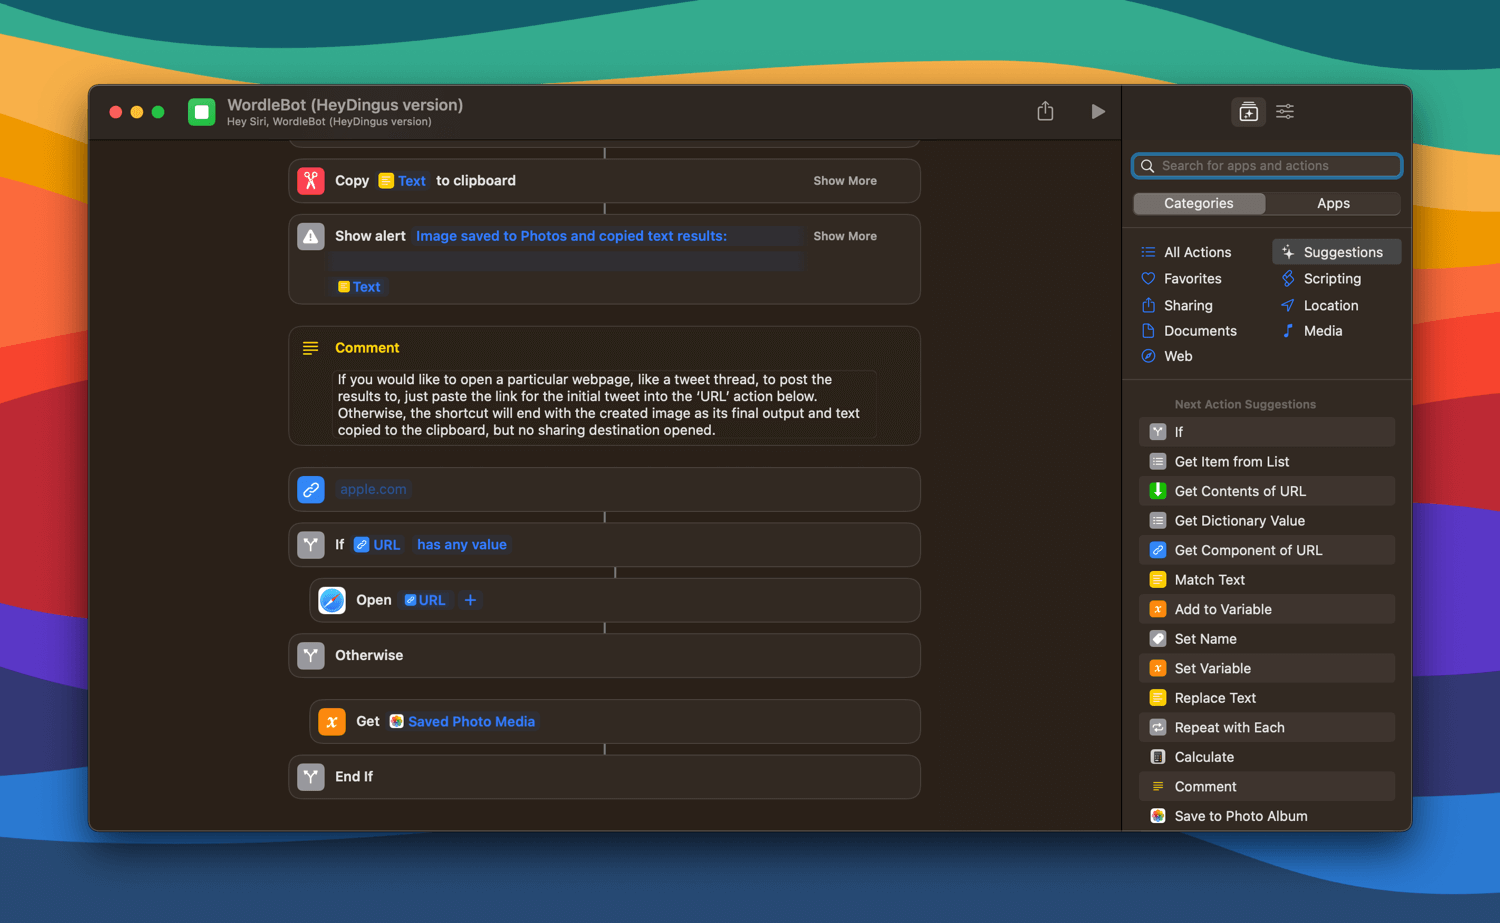
The rest of the flow for sharing remains the same from Federico’s WordleBot. You still get the grid image from your photo library when you’re ready to share. But I added one final option: if you always share your Wordle results to the same place, you can automatically open that web page. For me, it’s a Twitter thread. The ‘URL’ action is populated during a setup question, and if you choose not to use that feature, the shortcut ends by outputting the saved grid image.
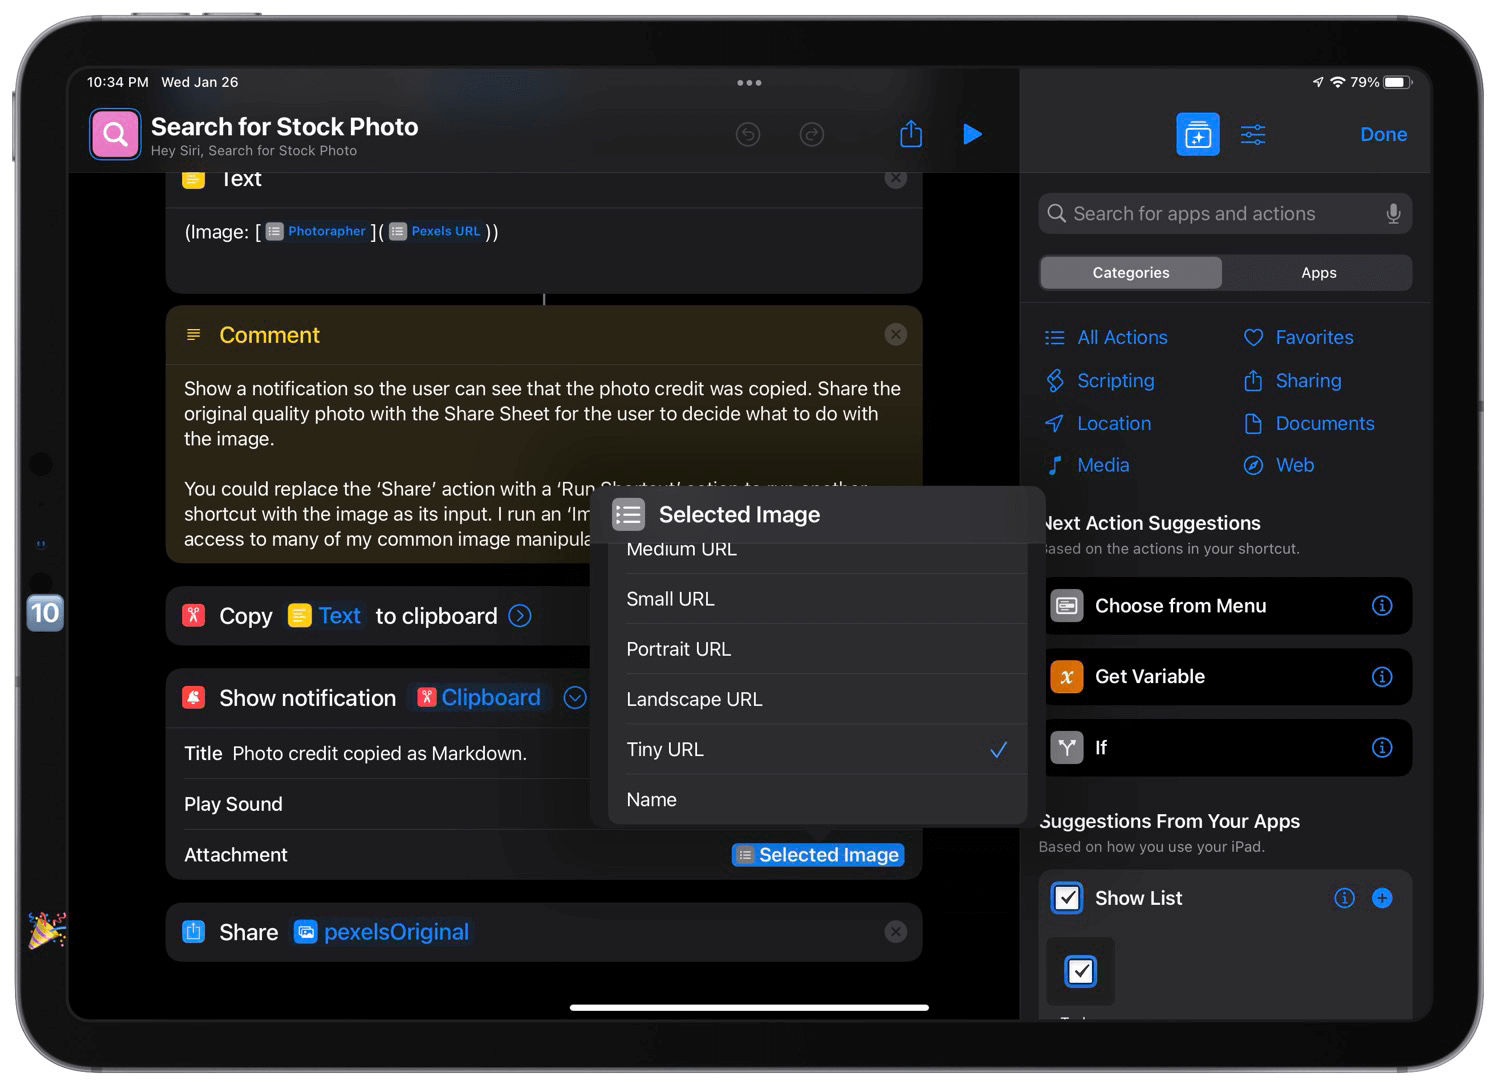
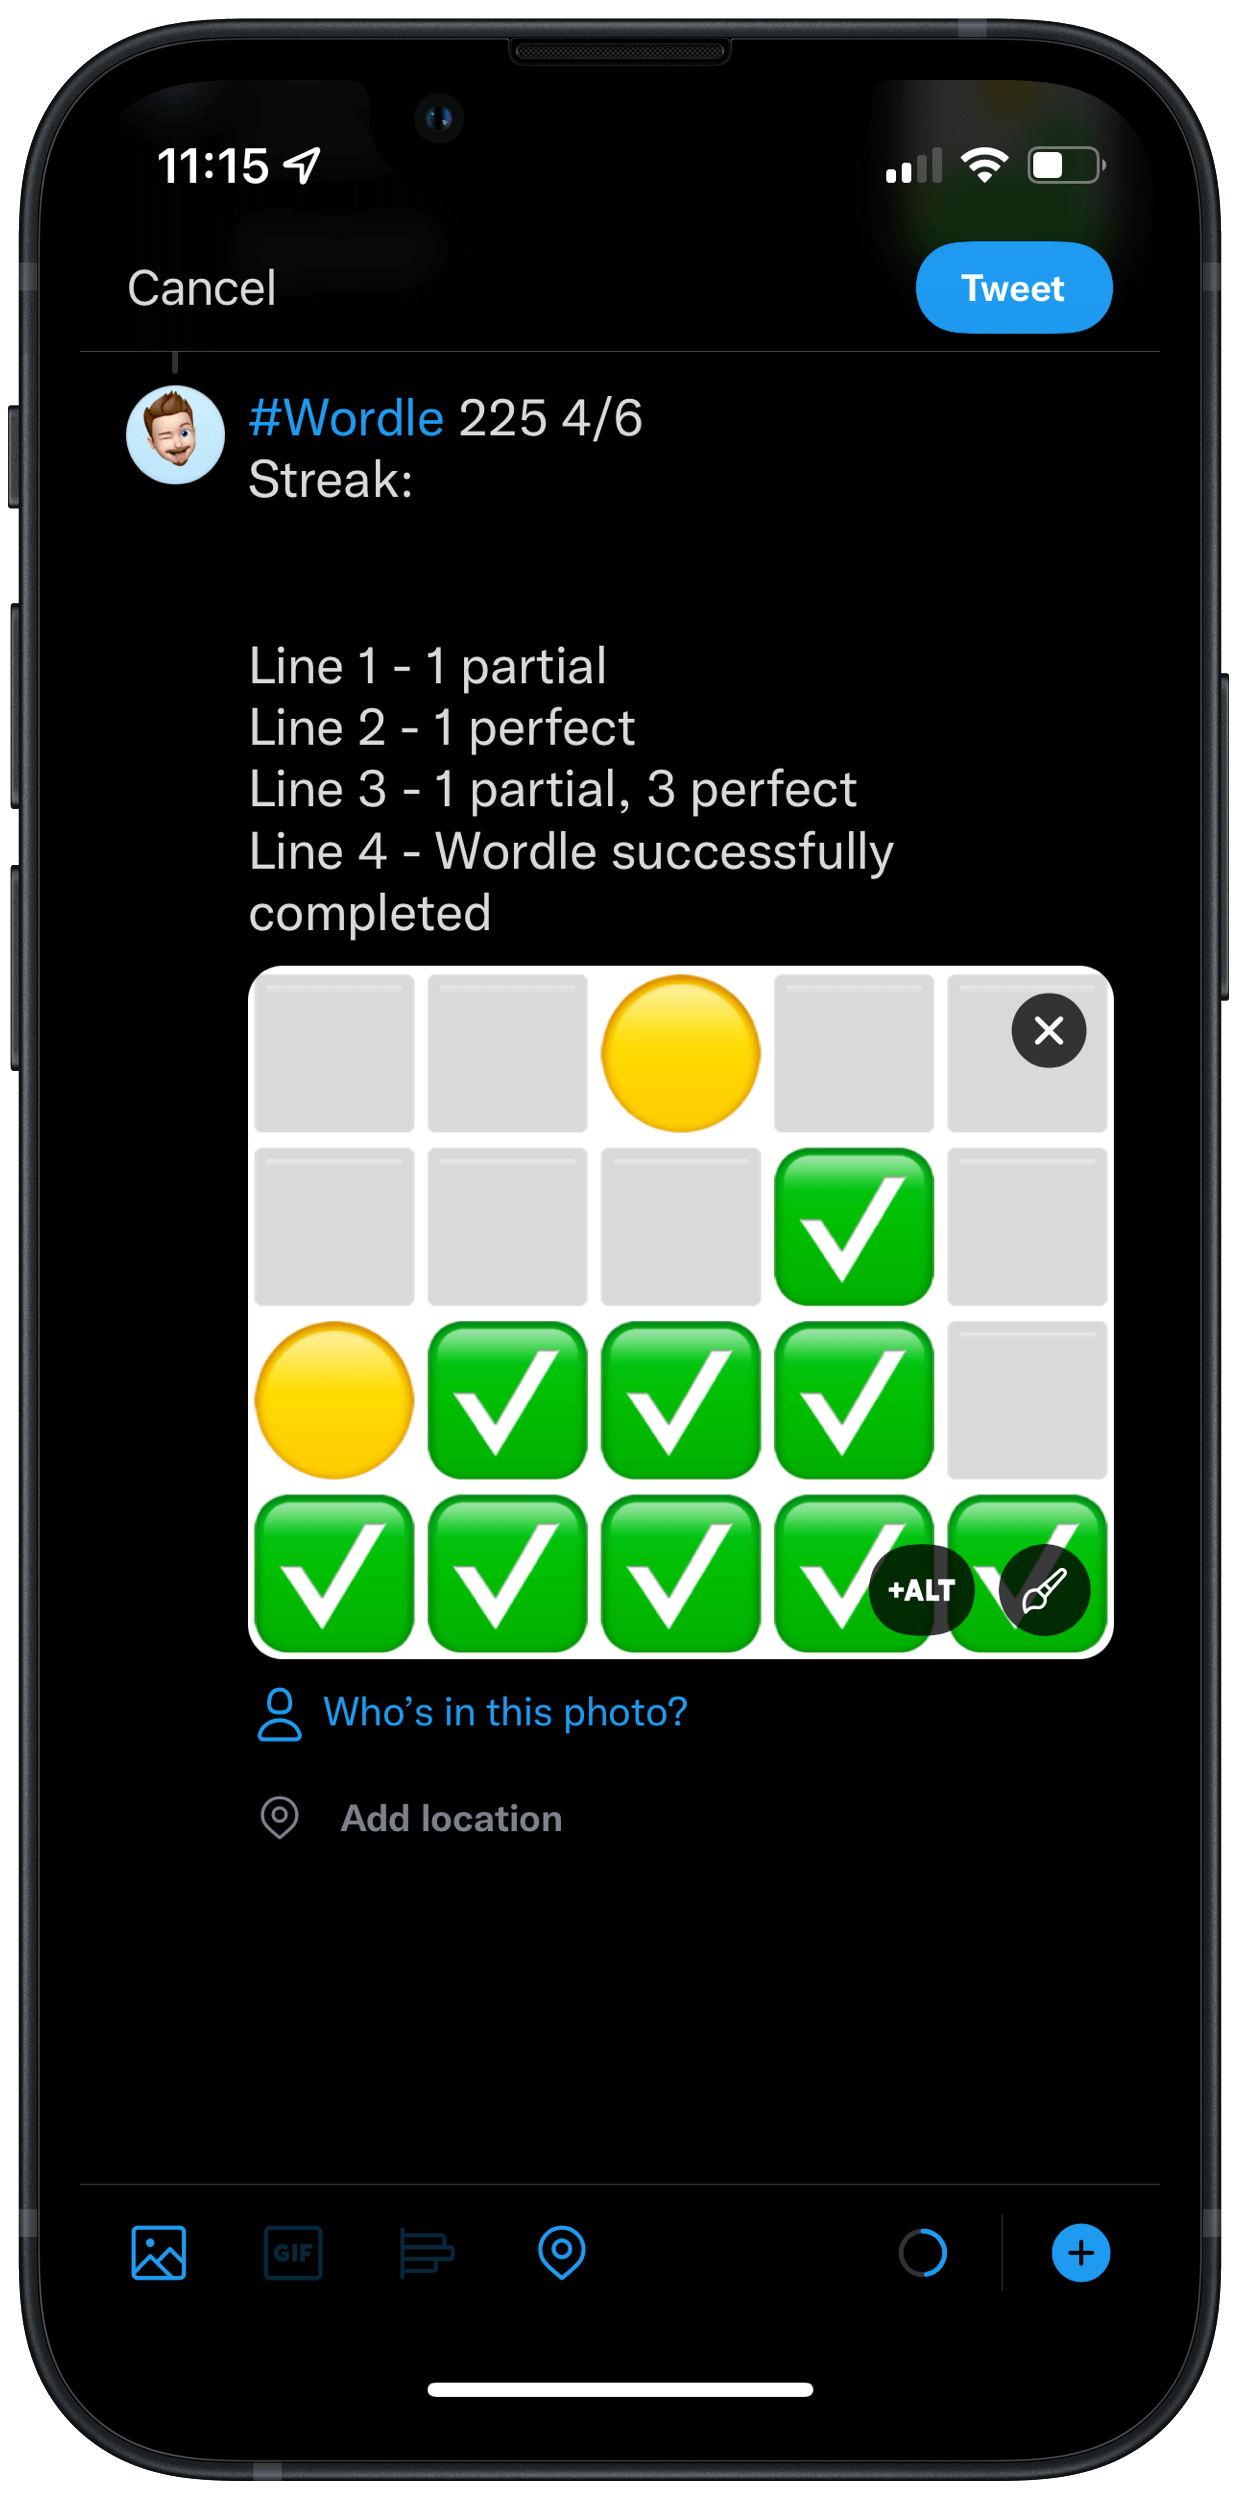
In the end, we’re left with the quintessential Wordle grid — readable by people regardless of seeing ability — and text to share with the world. A few clipboard maneuvers get the Alt Text in the right place (the ‘+ALT’ button below), and it’s ready.
Get the ‘WordleBot’ shortcut → My Original Version | Latest Version
This whole saga around Wordle accessibility warms my heart. A few years ago, it may not have been part of the discussion at all. But I’m glad that folks are thinking about making even small things, like silly game emoji on social media, more inclusive. I’m happy to have played a small role and look forward to using WordleBot again tomorrow morning.
My thanks to Zach Knox for getting the ball rolling and to Federico Viticci for doing the heavy lifting on this shortcut. I decided not to change the ‘WordleBot’ name since most of it is still Federico’s work.
If you see how WordleBot can be further improved, please do let me know! And if you’re using it to share your results, best of luck on tomorrow’s word.